


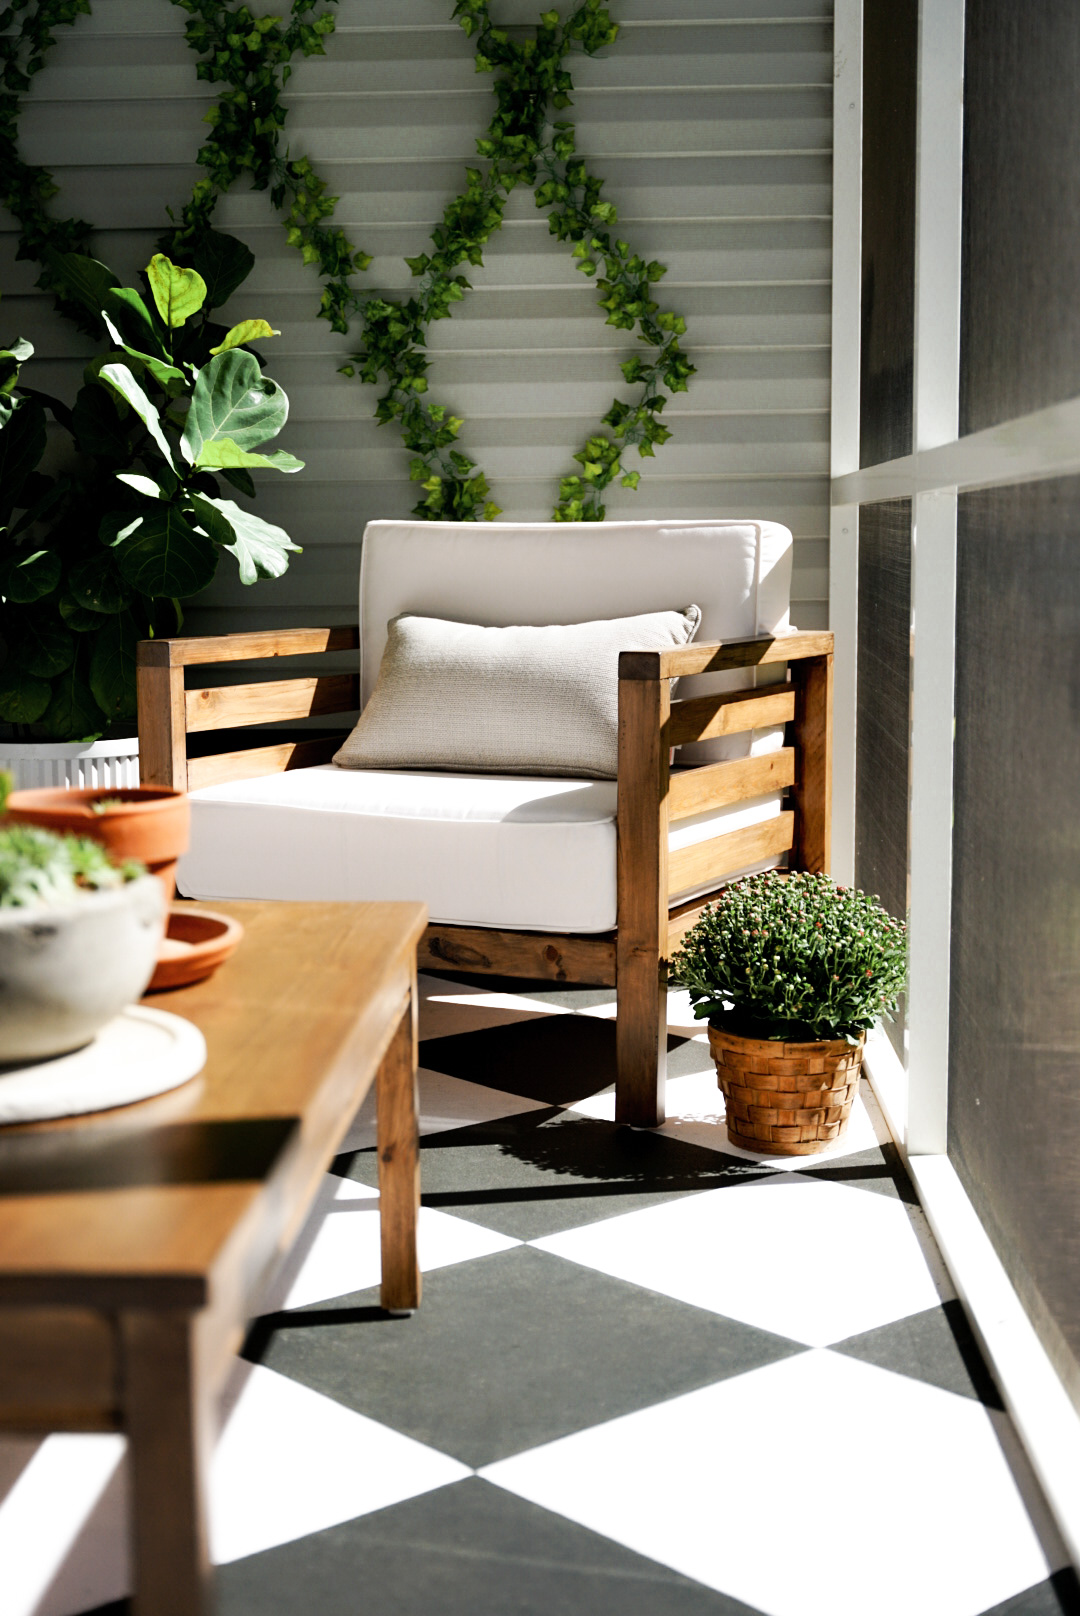
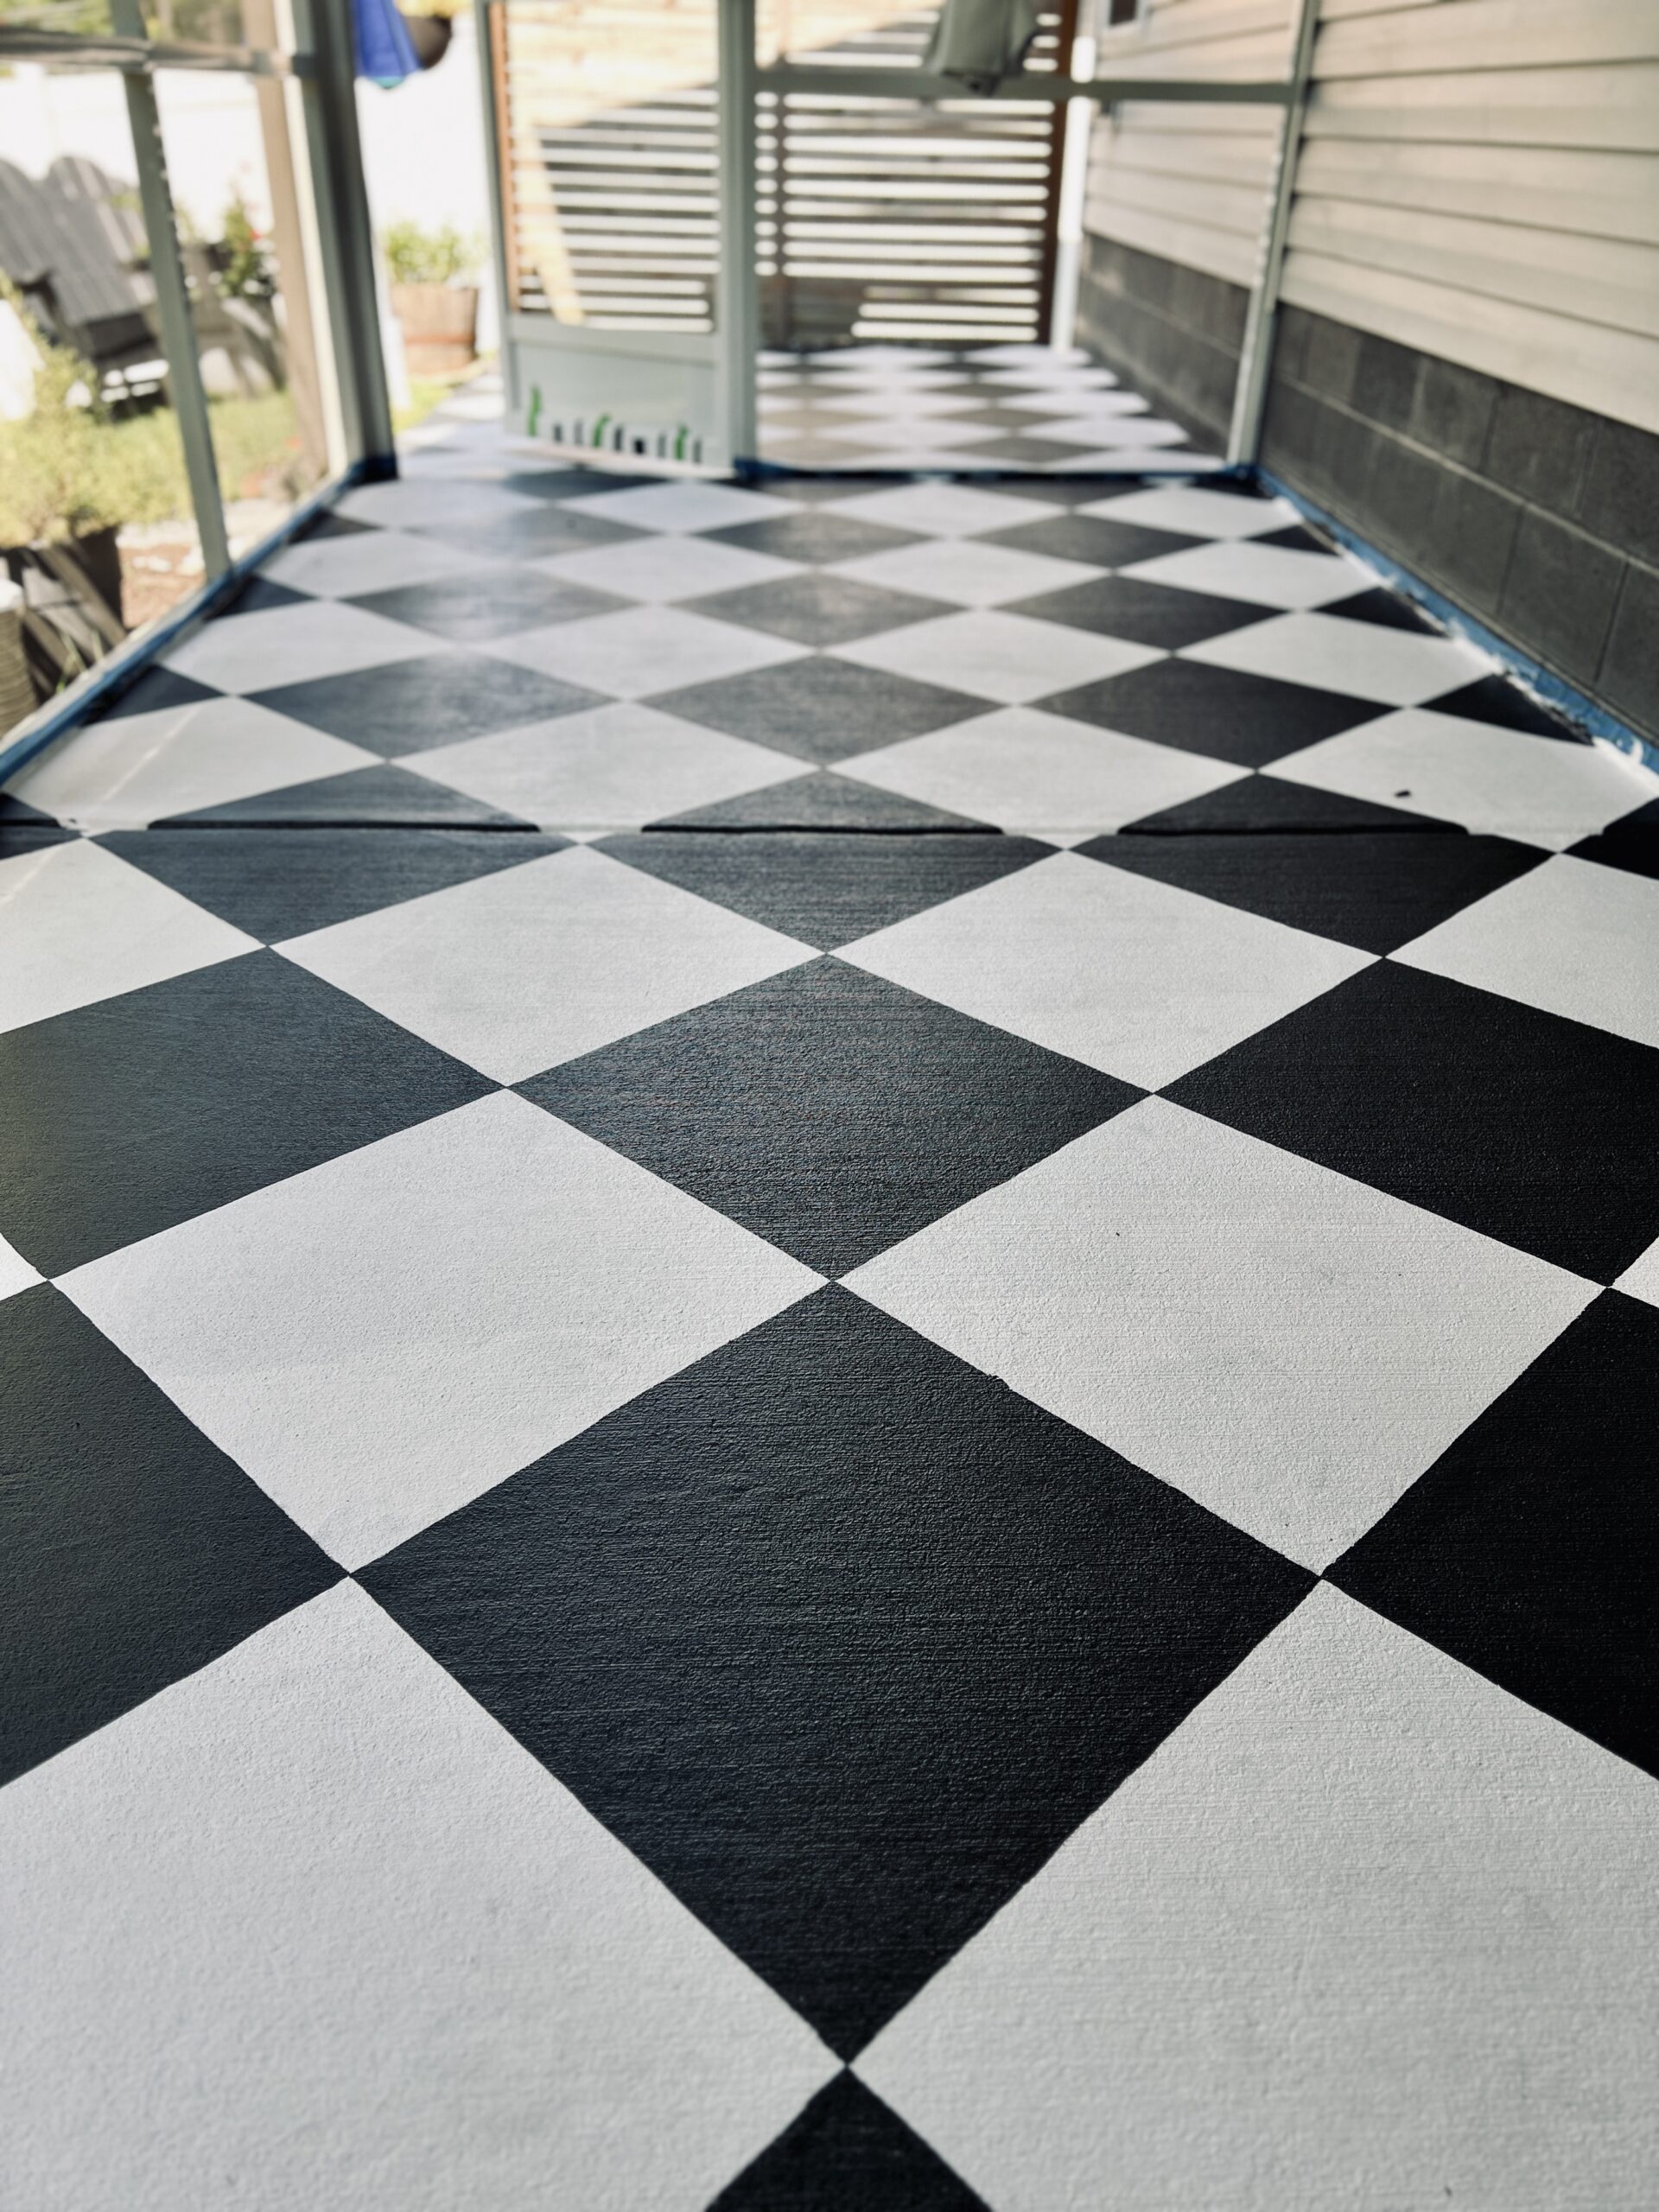
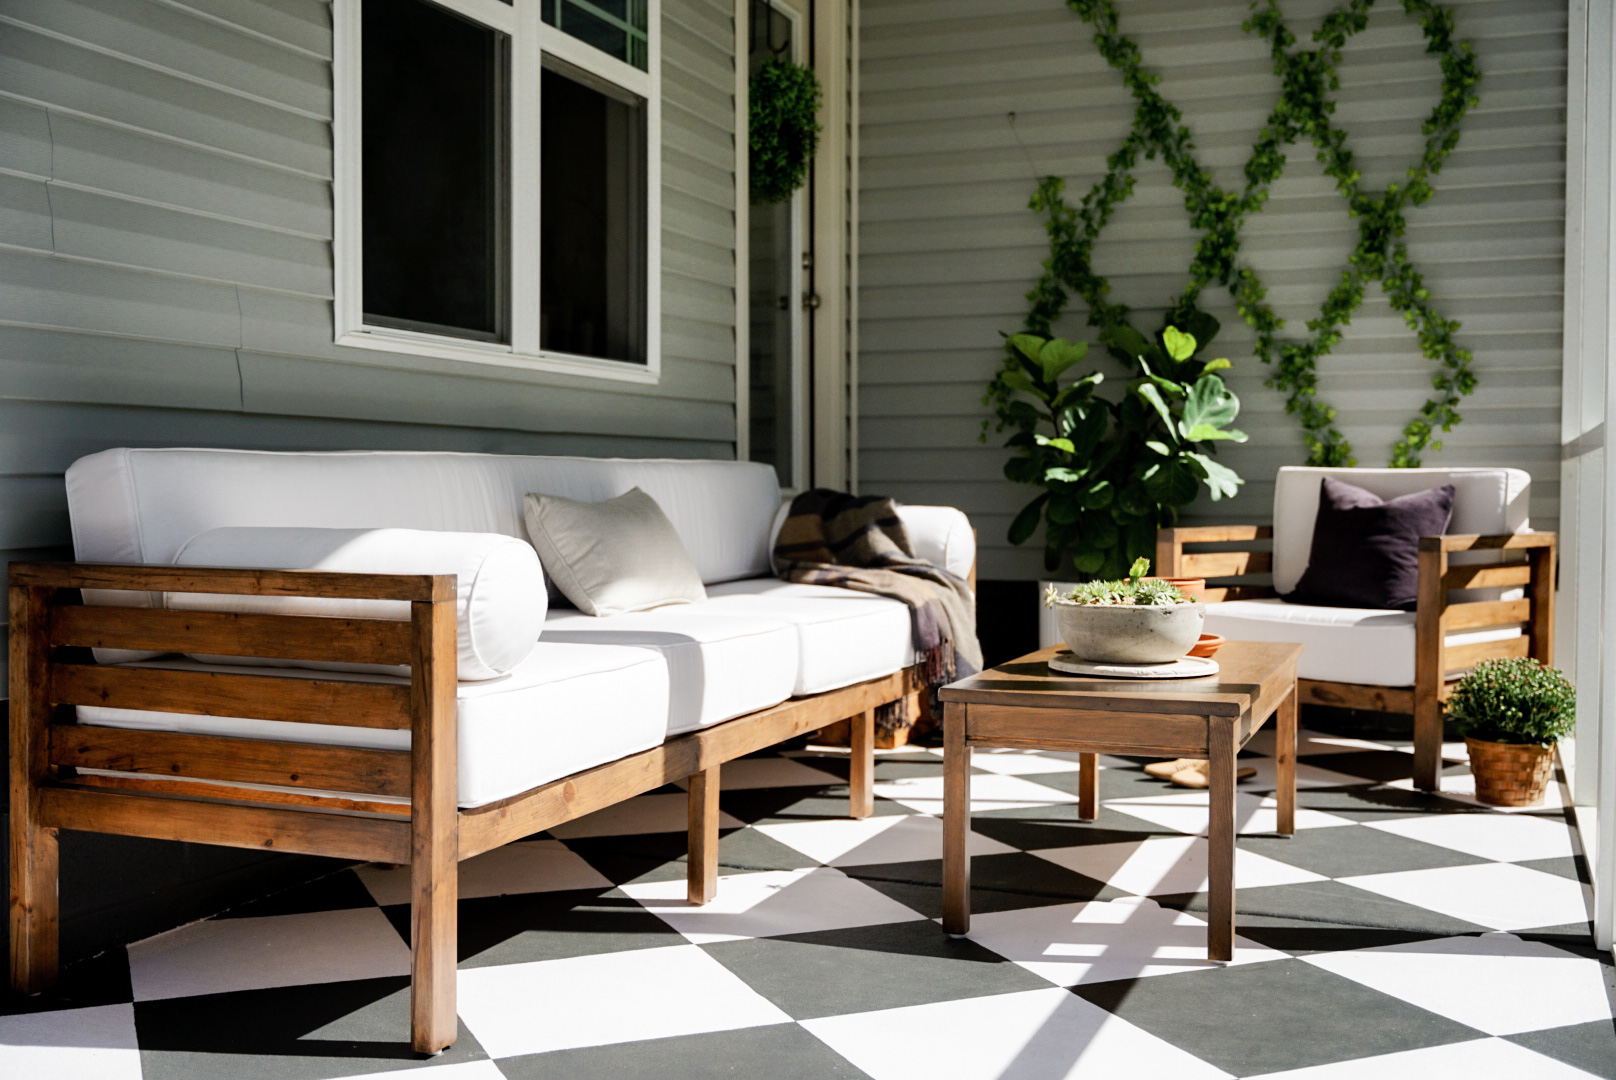
I painted MY ENTIRE back porch and patio in a classic checkerboard pattern.. and I have never been so proud of a project!
It’s everything I dreamed it would be and I am so excited to share this tutorial with you.
This patio project has been on my radar since the day we did a walk through before buying our home. It feels like it was always meant to be. Don’t ask me how many times I walk past the window and just stare at it… A L O T! But this dream turned reality makes the long hours to get here worth it and now I get to enjoy every single hard earned moment! This project is something anyone can tackle, with a little planning, sweat work and some patience, you can enjoy a gorgeous custom patio floor to treasure for years too!
Let’s dive into all the fun details!
(This post is not at all sponsored by Valspar paint, all opinions are mine from personal experience.)
Affiliate Disclosure: There may be affiliate links in this post! By clicking these links or purchasing items recommended by me, I will receive a small compensation, at NO extra cost to you. You can rest assured if I am recommending a product, I love it! As always, thank you for supporting The Fisher House!!*
Supplies
- Pressure Washer (if highly trafficked area or visibly dirty)
- Porch & Patio Paint (I had two gallons for two separate colors)
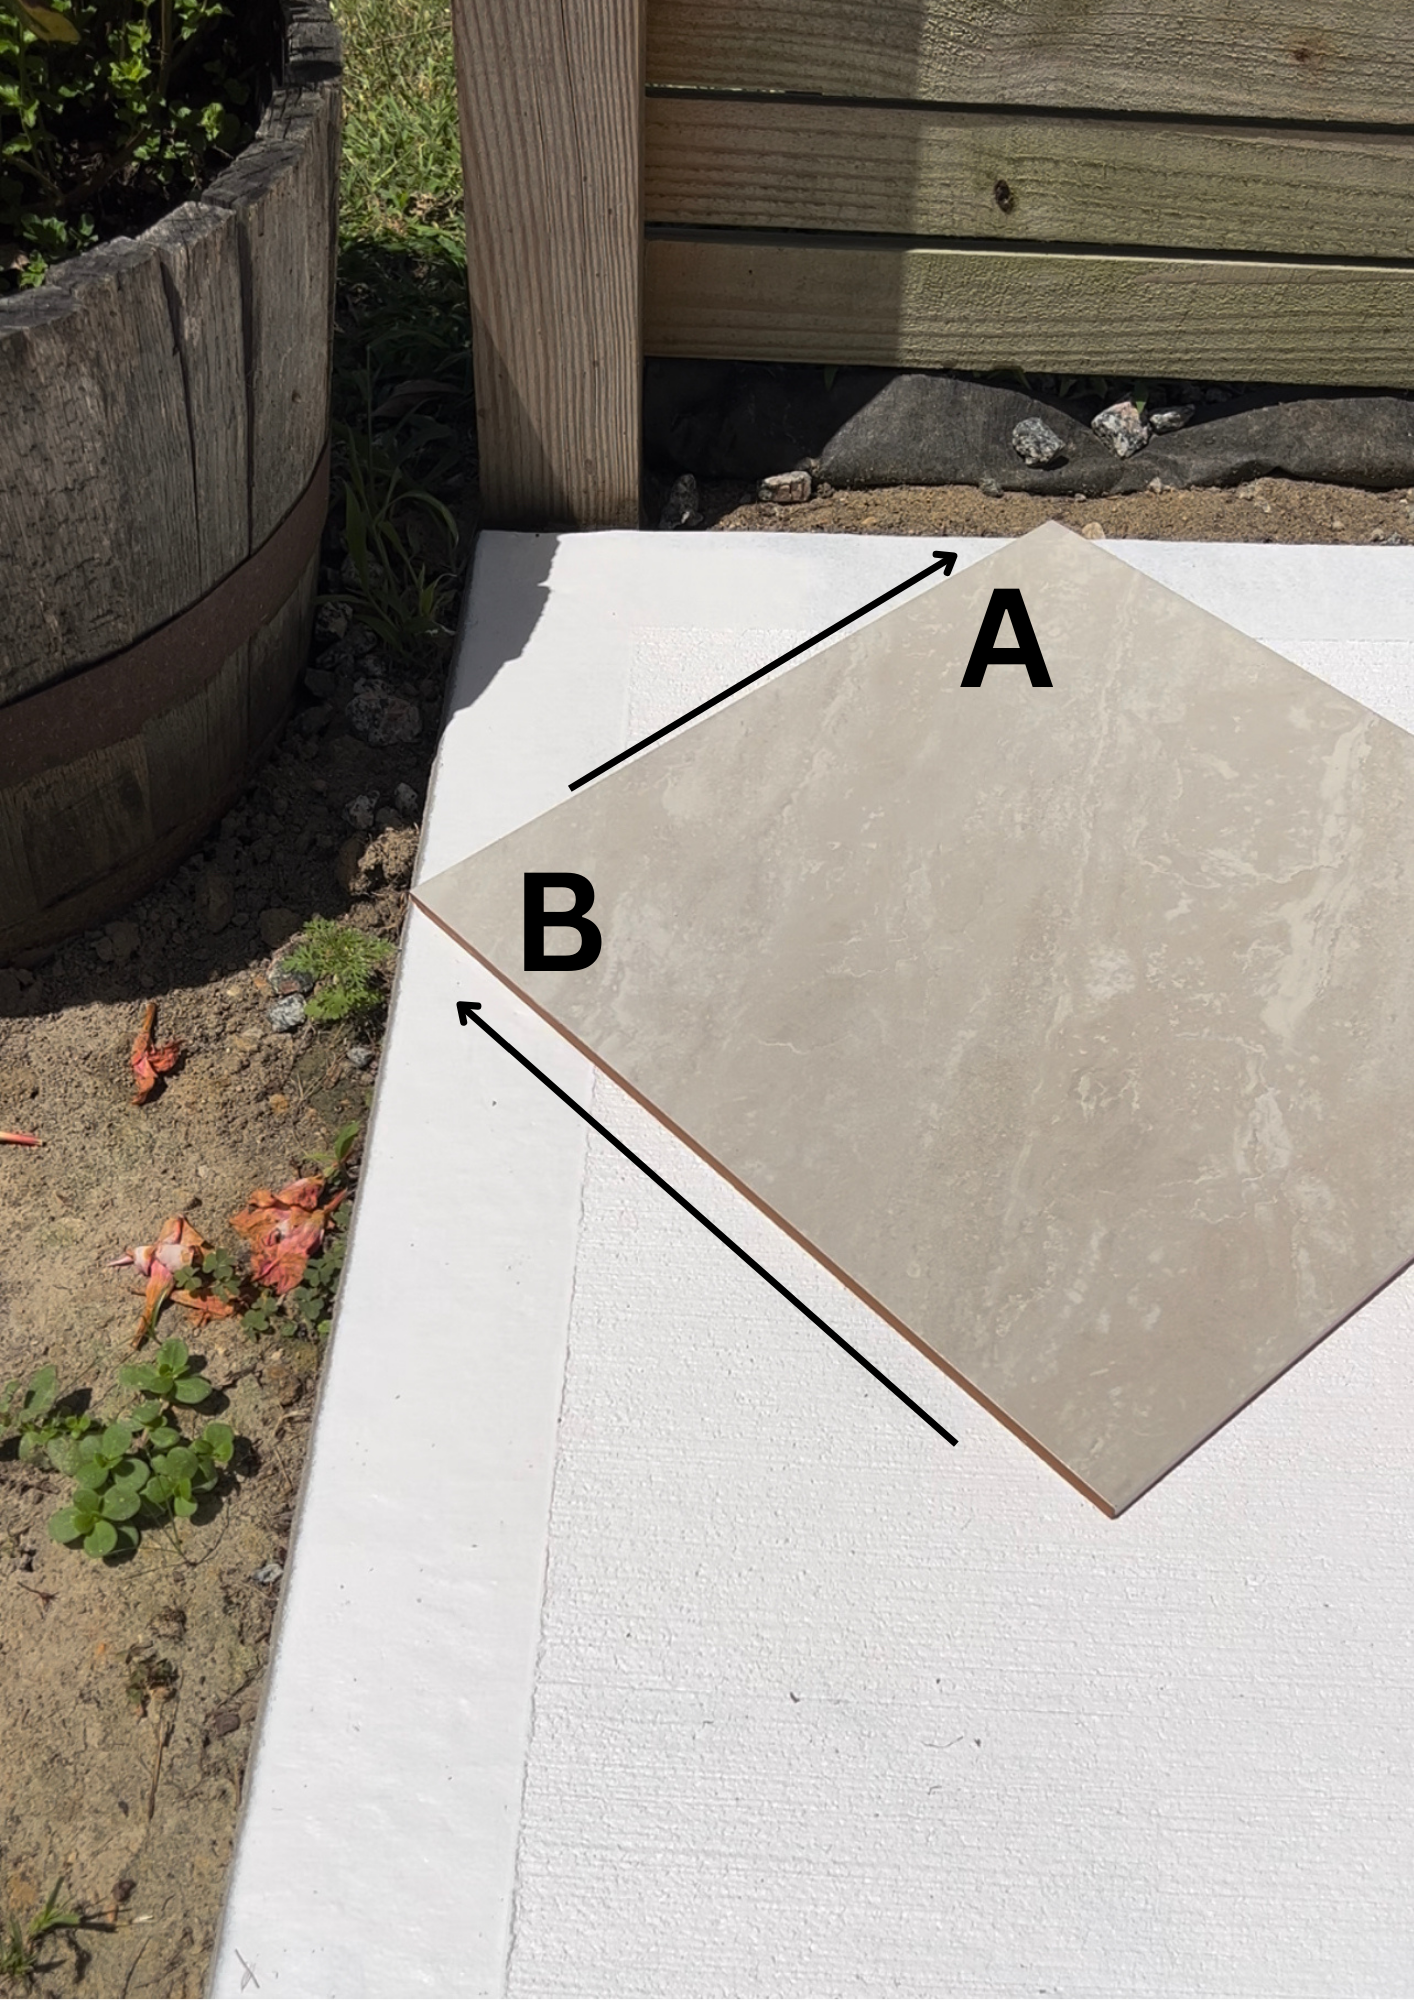
- 18 X 18 Tile (This was the cheapest one!)
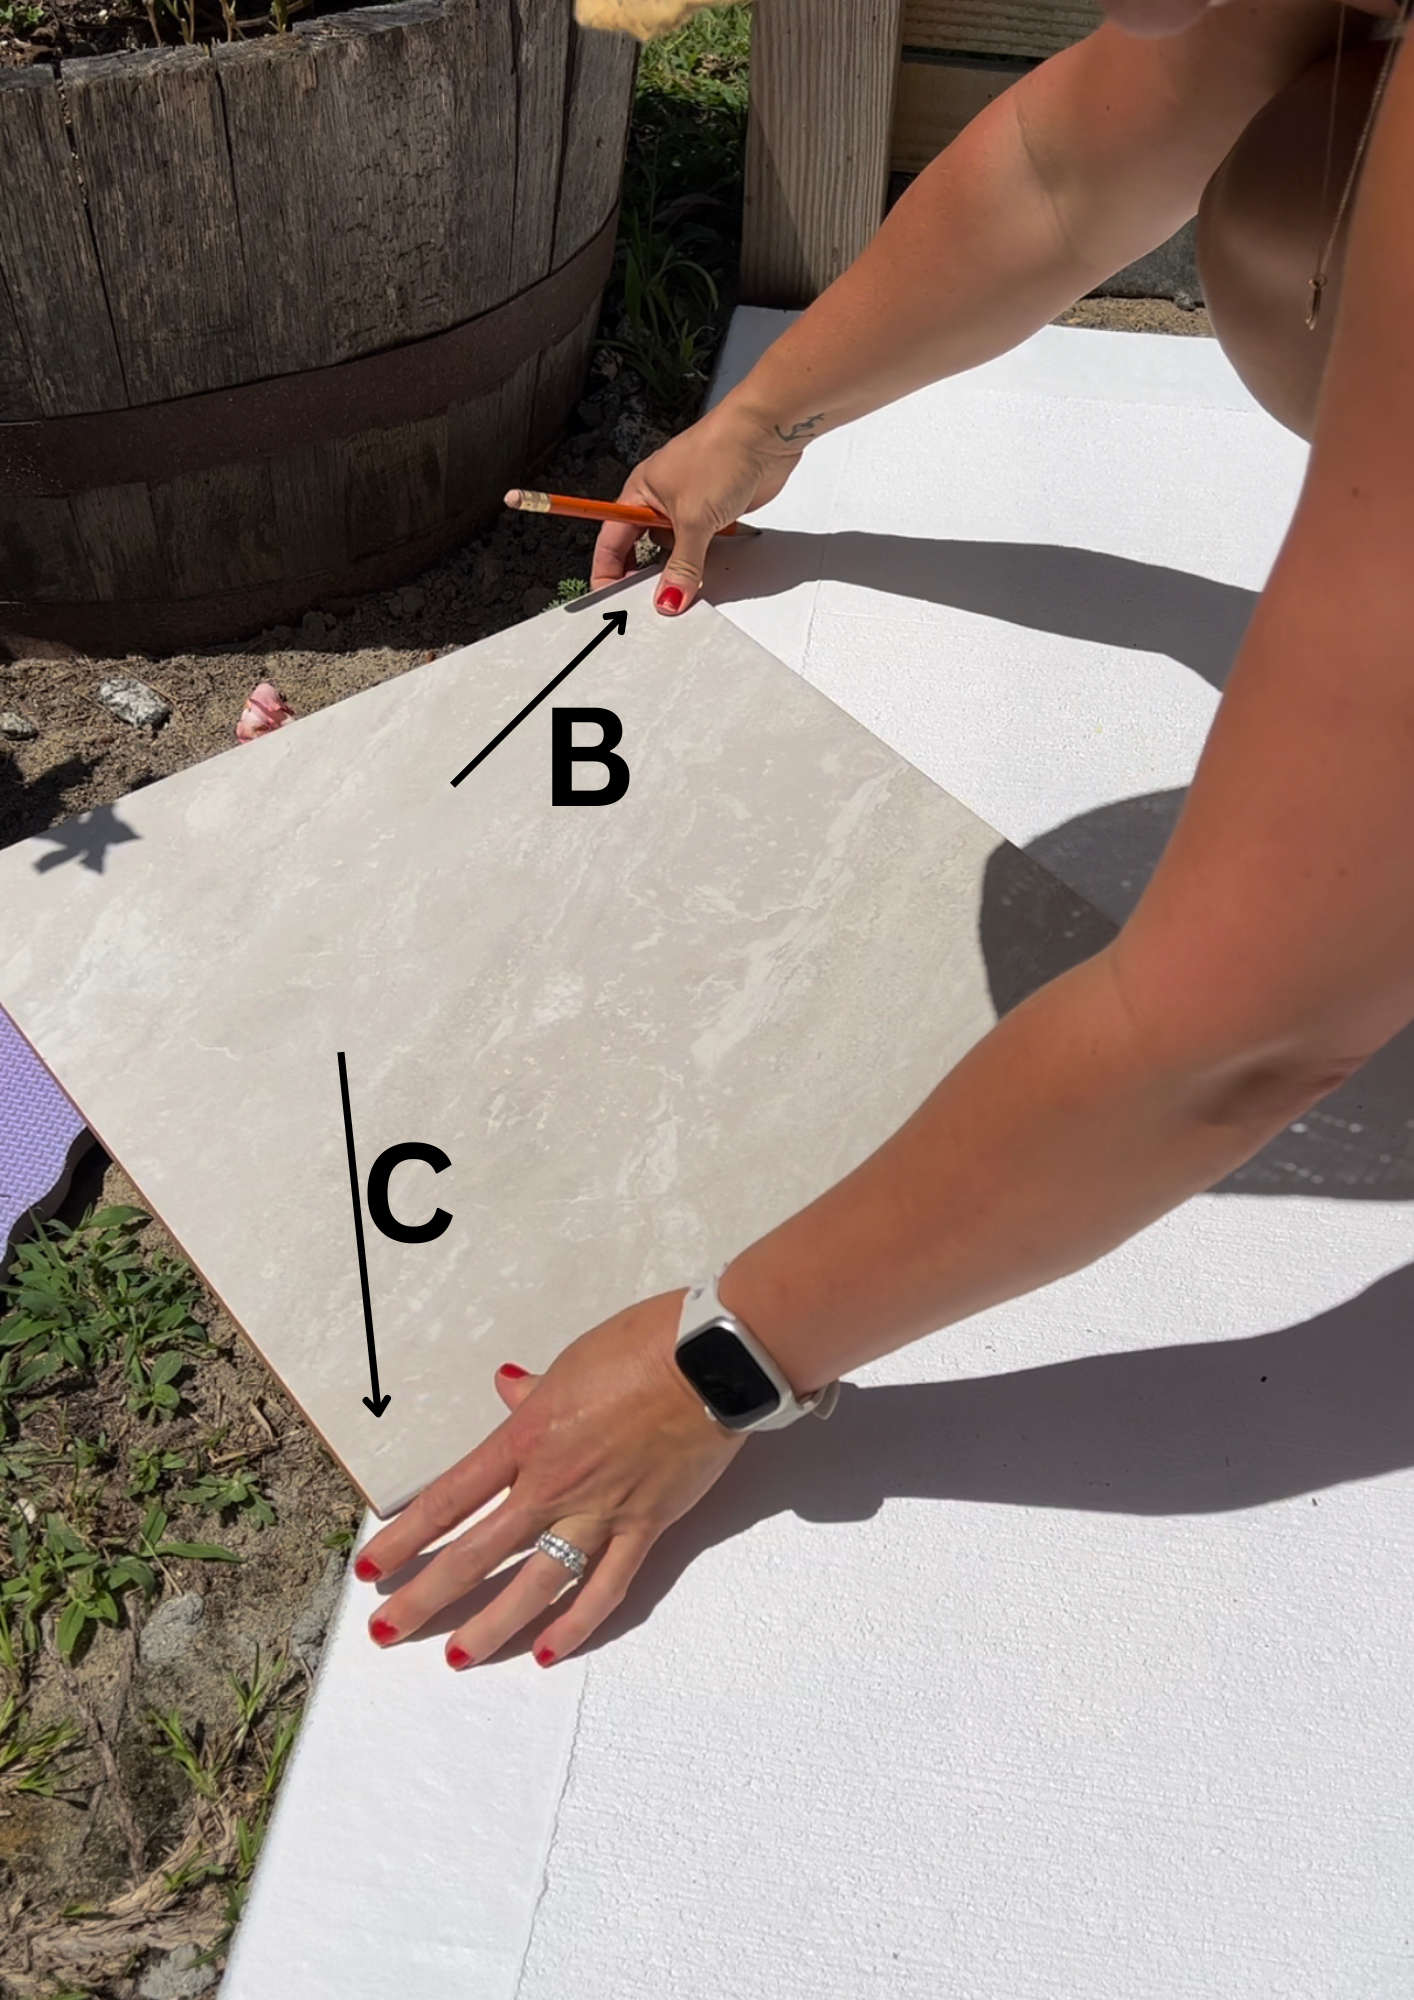
- Woodworking Pencil
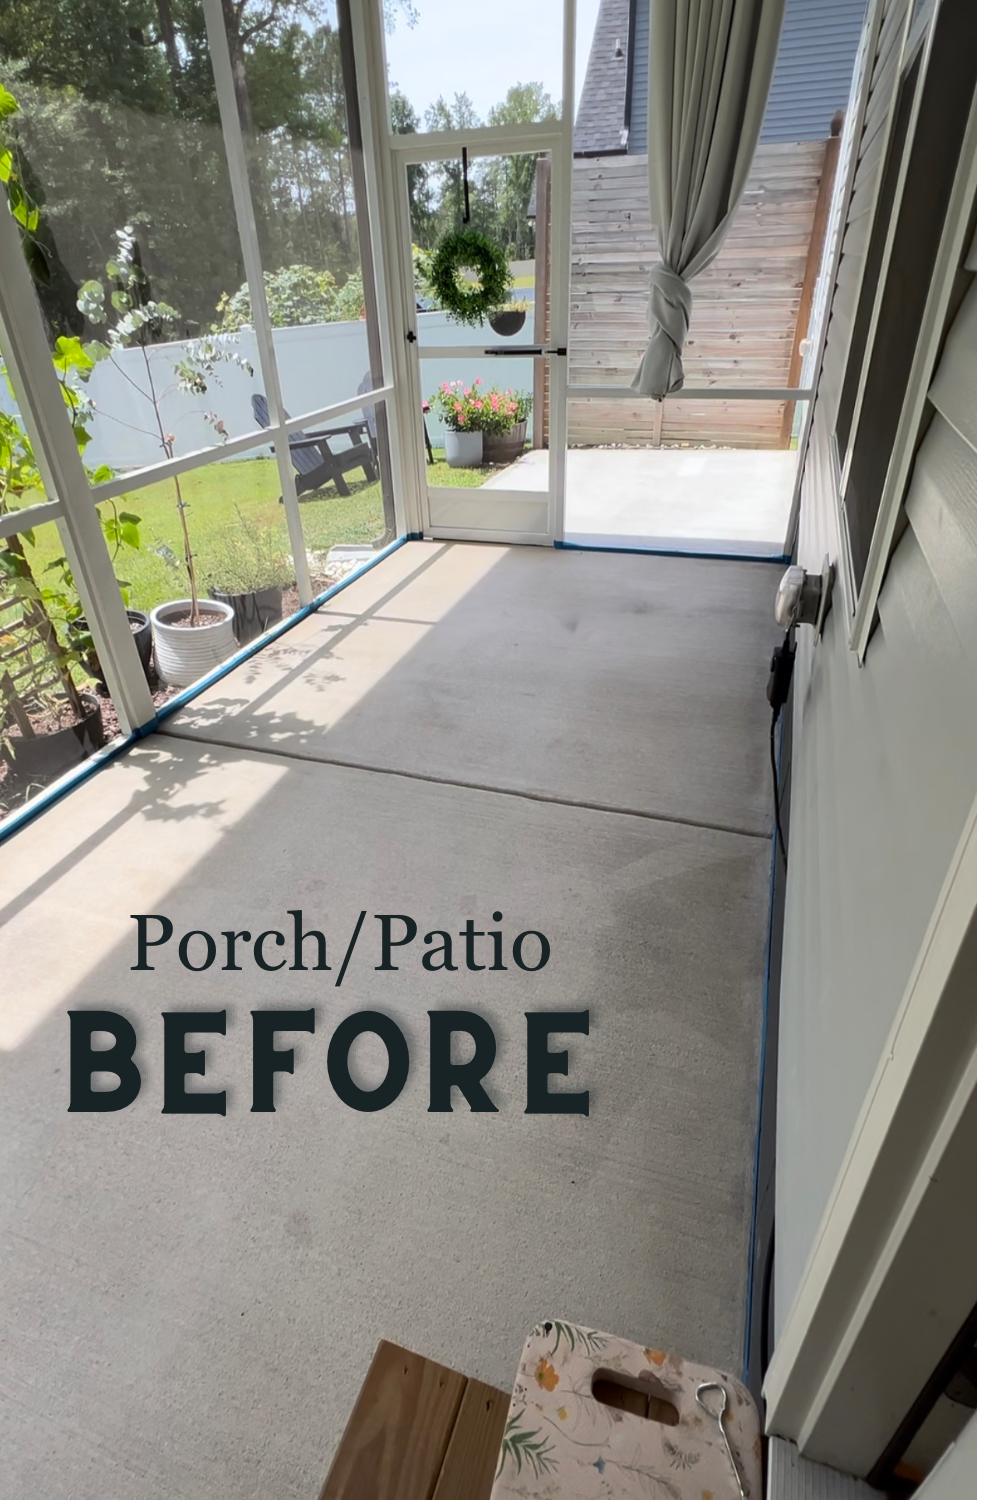
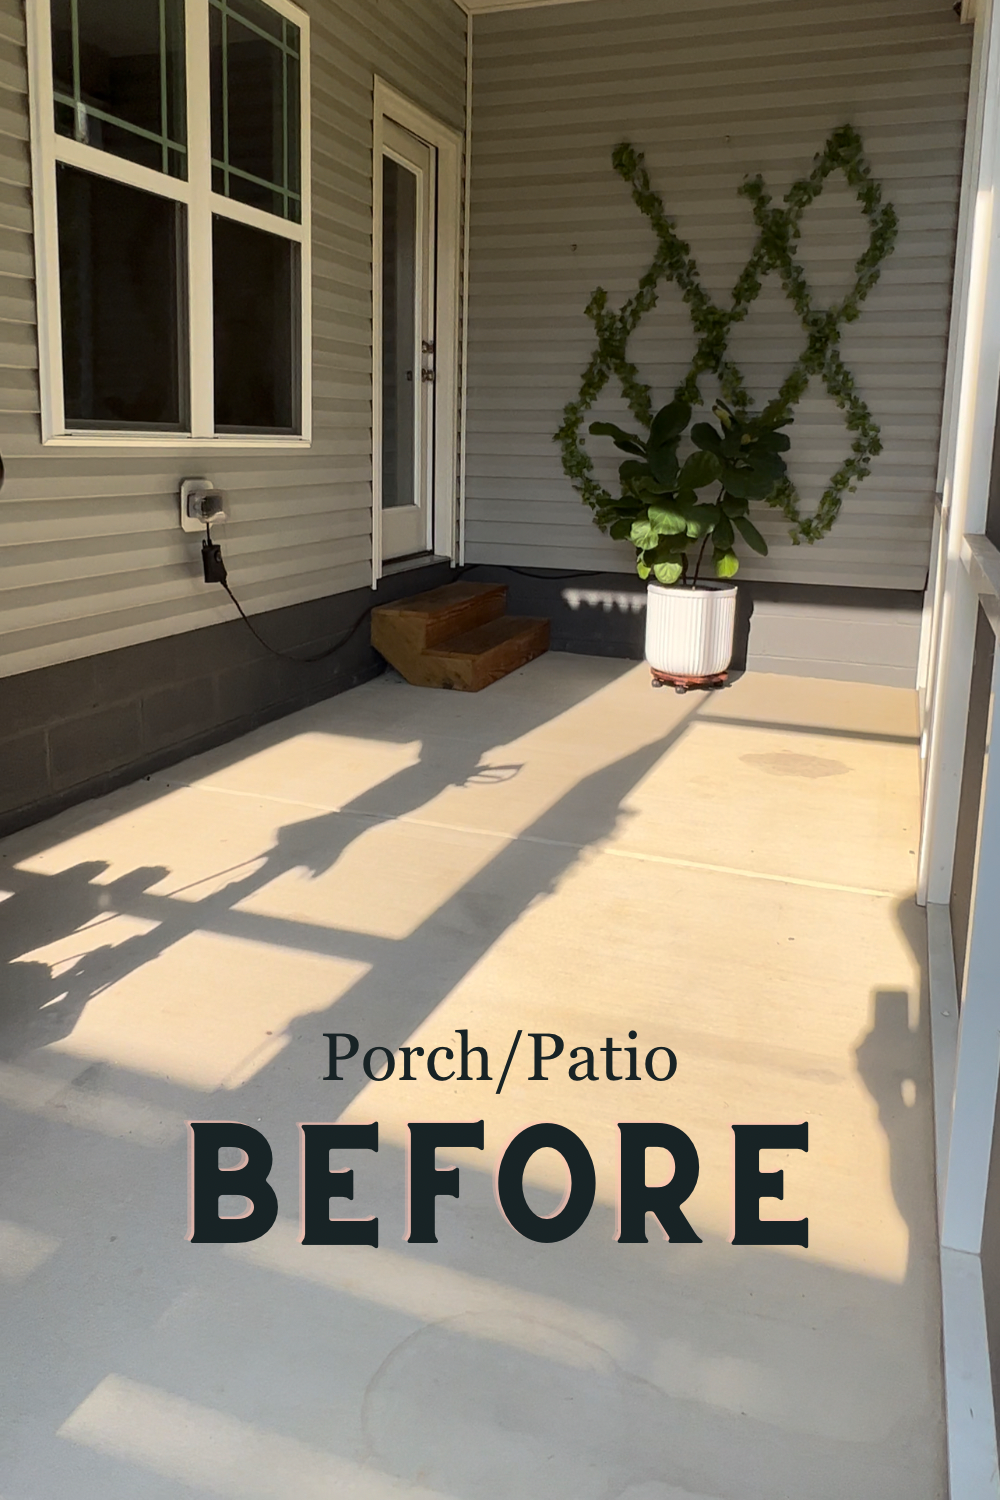
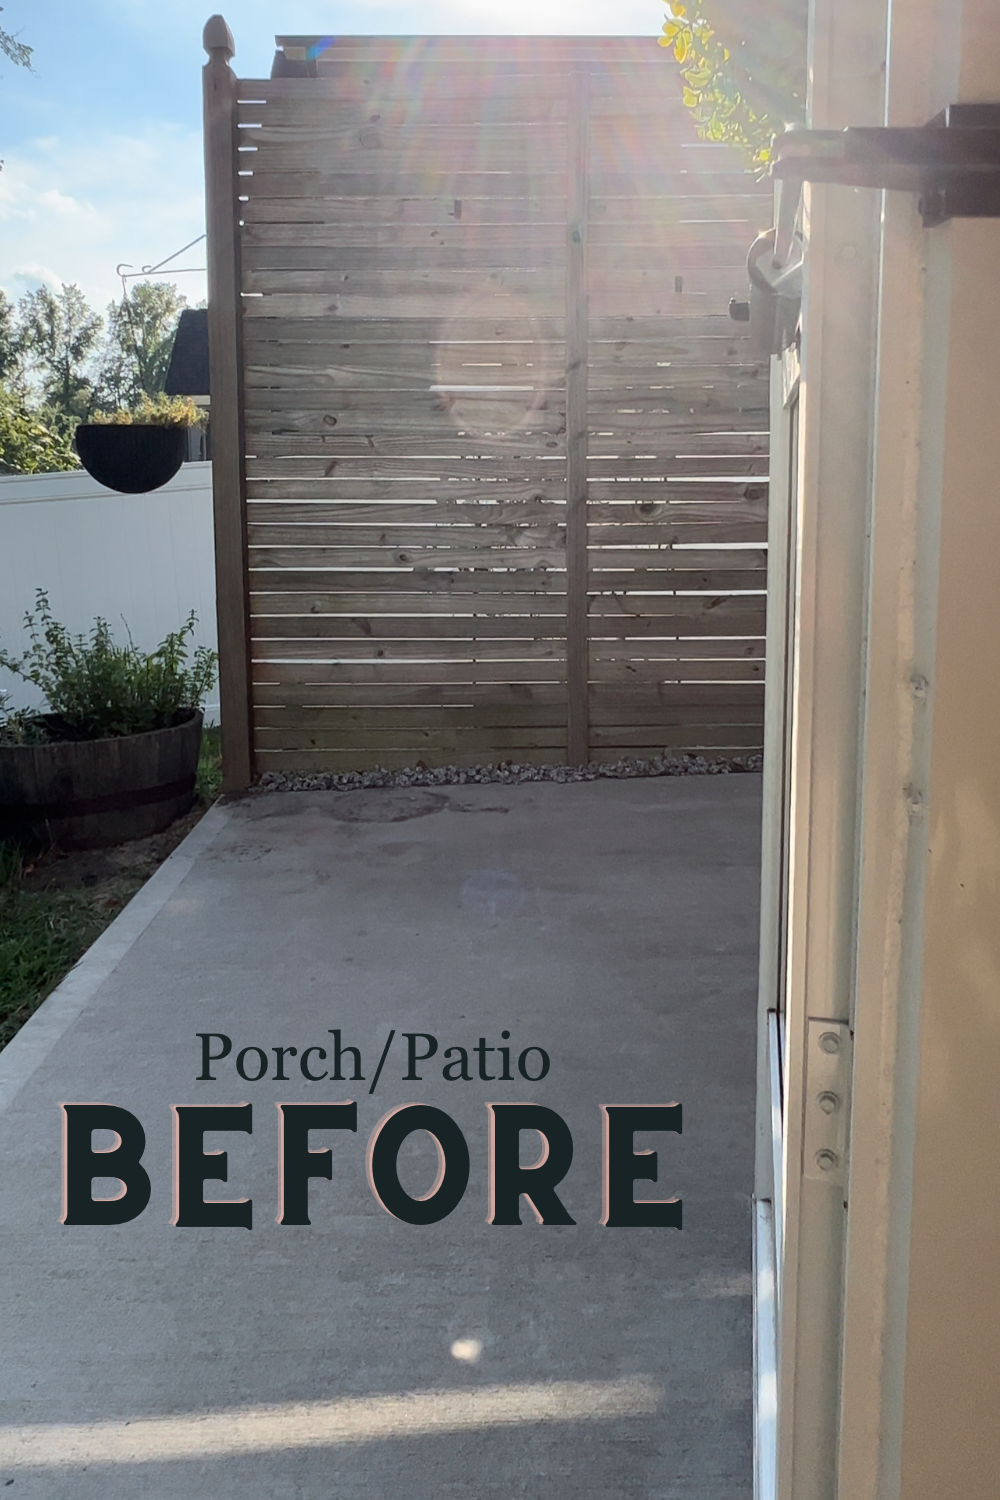
Porch & Patio Before
3 years ago- 2020
DIY outdoor couch, chair & coffee table
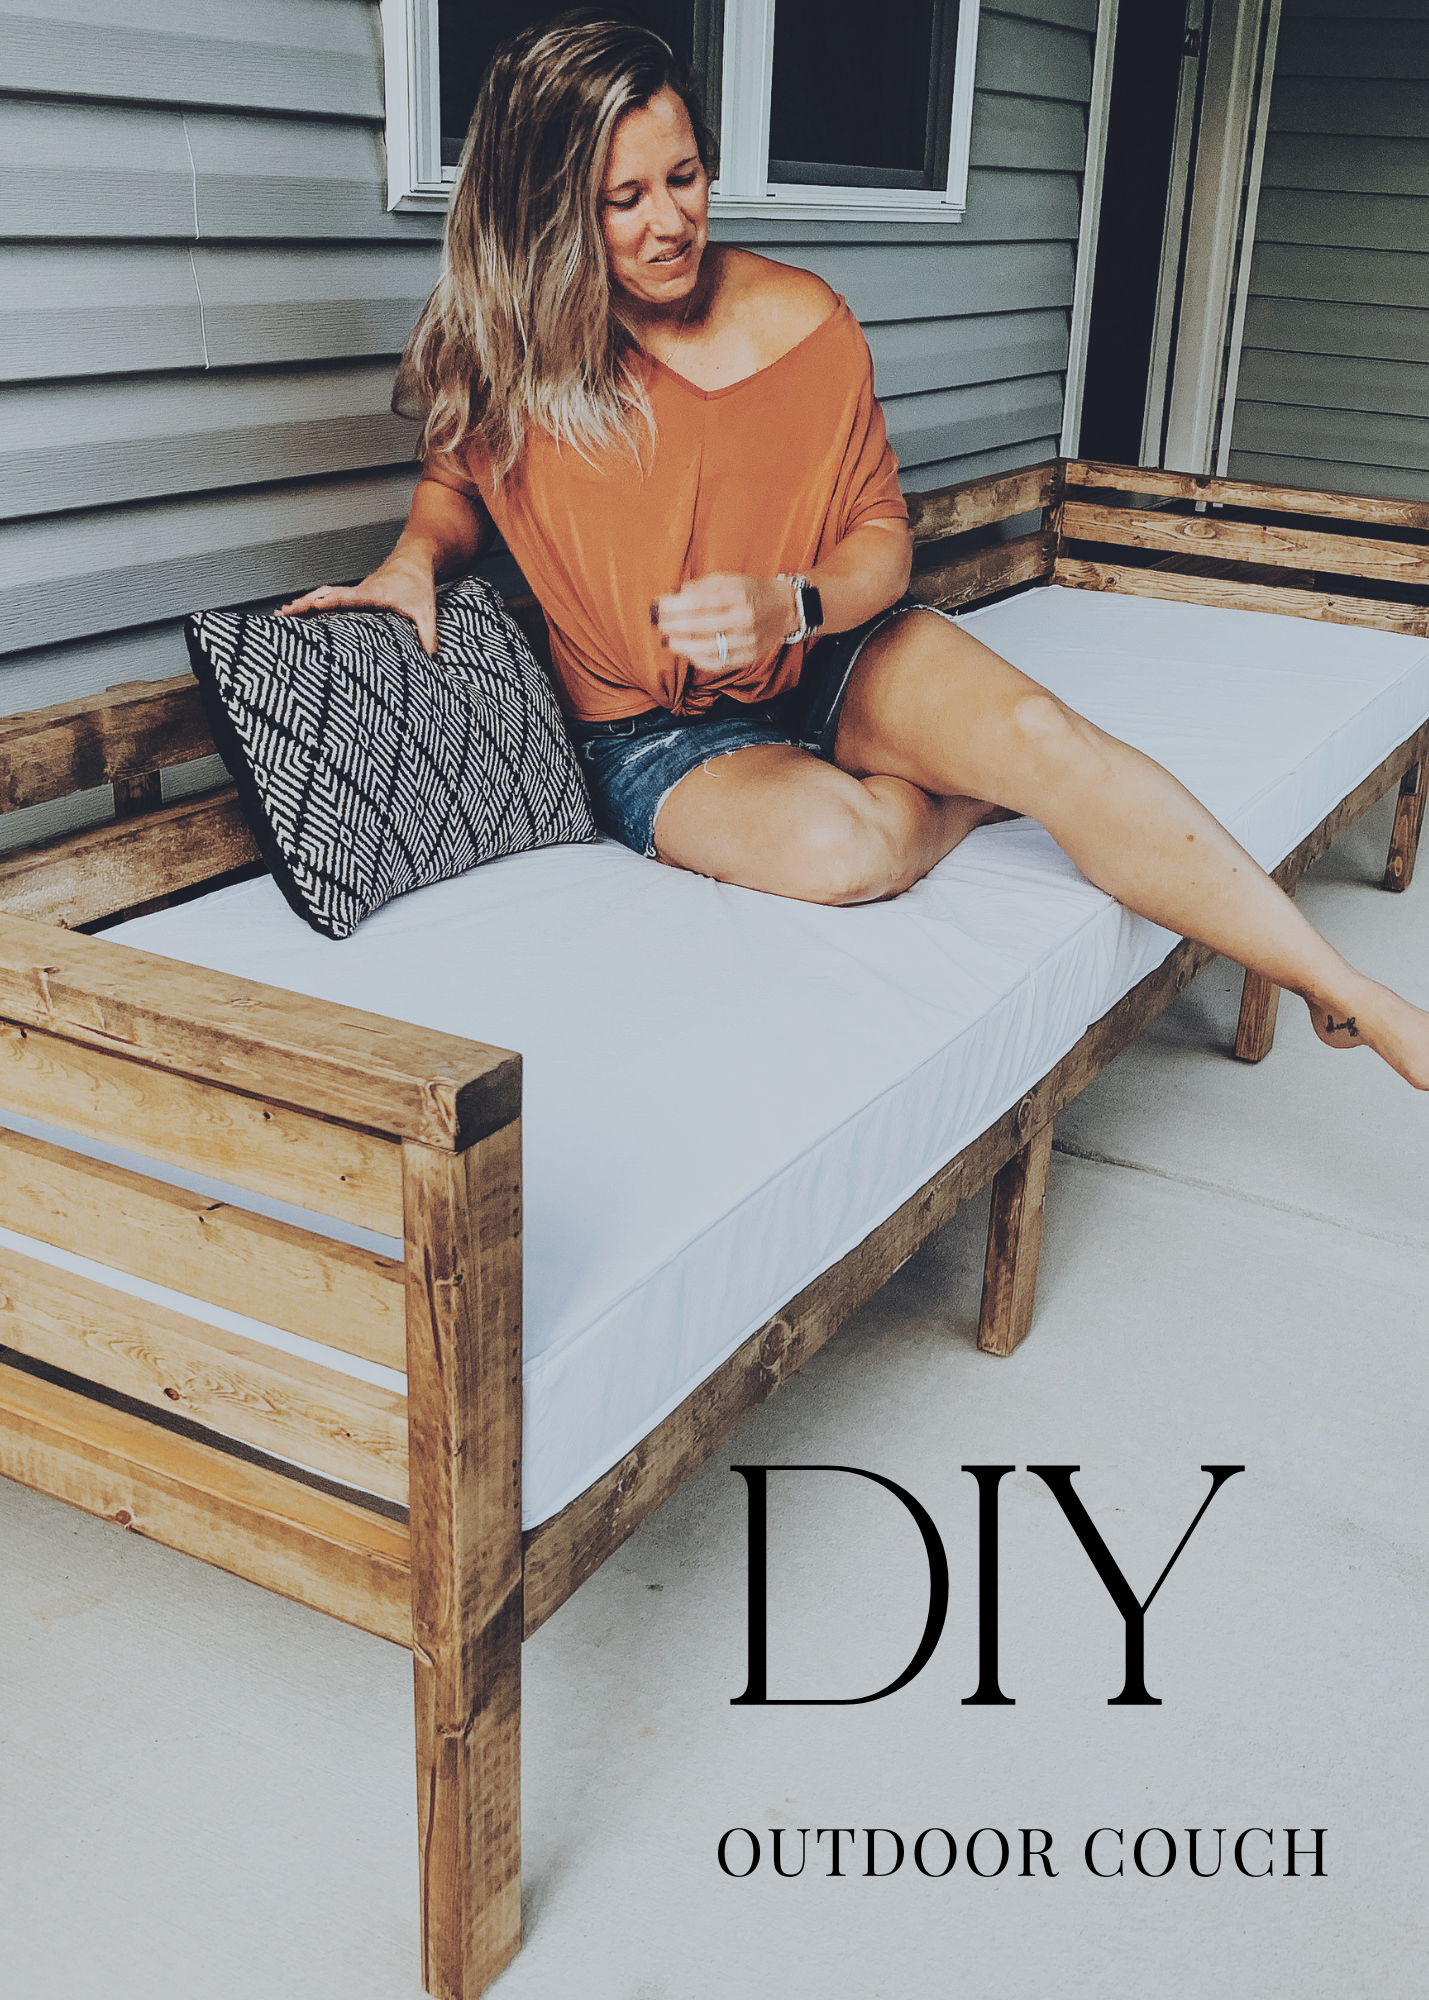
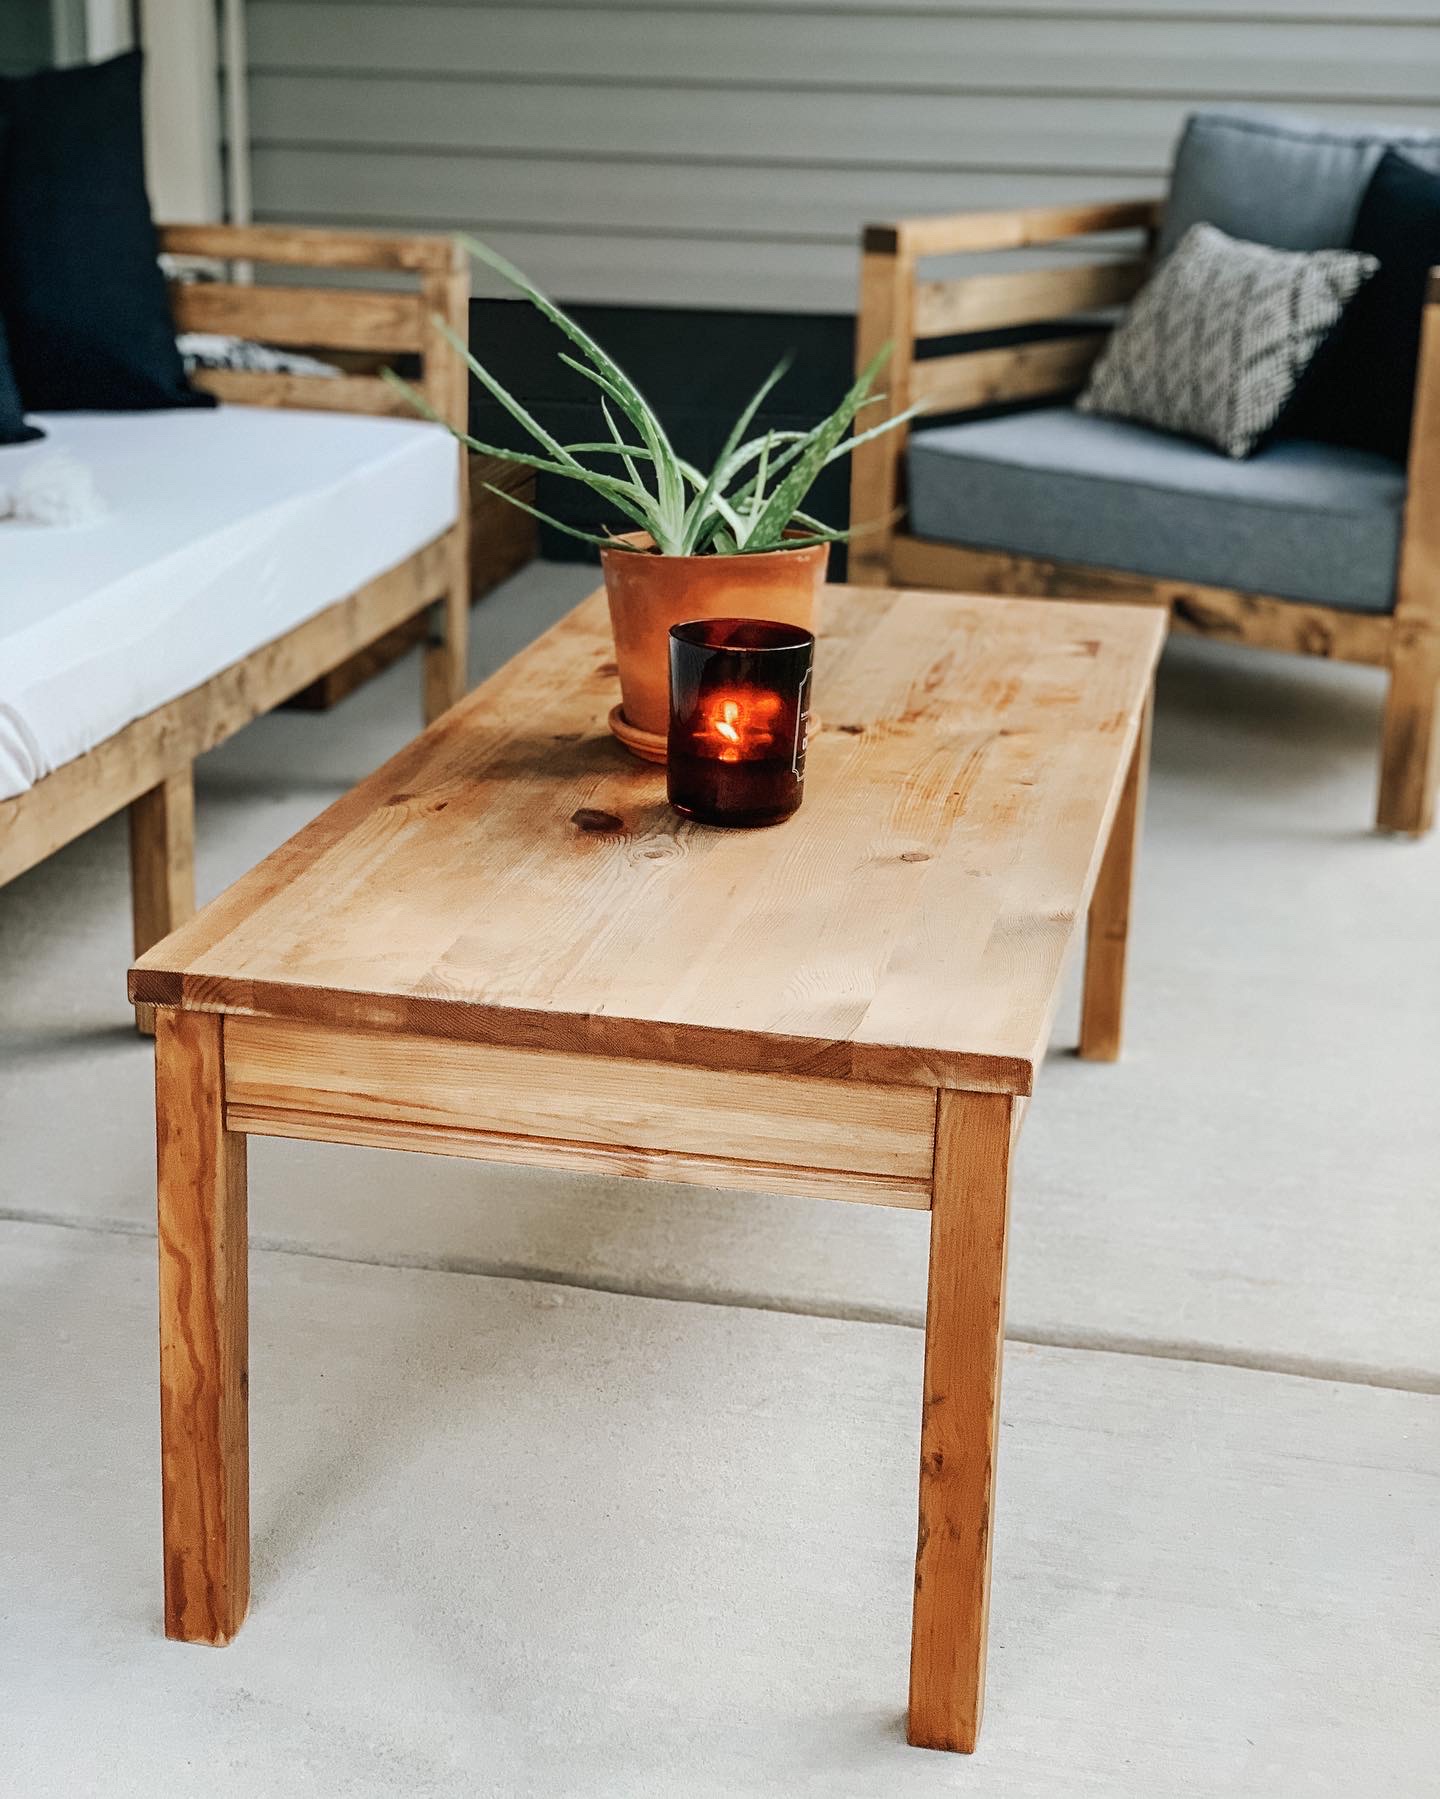
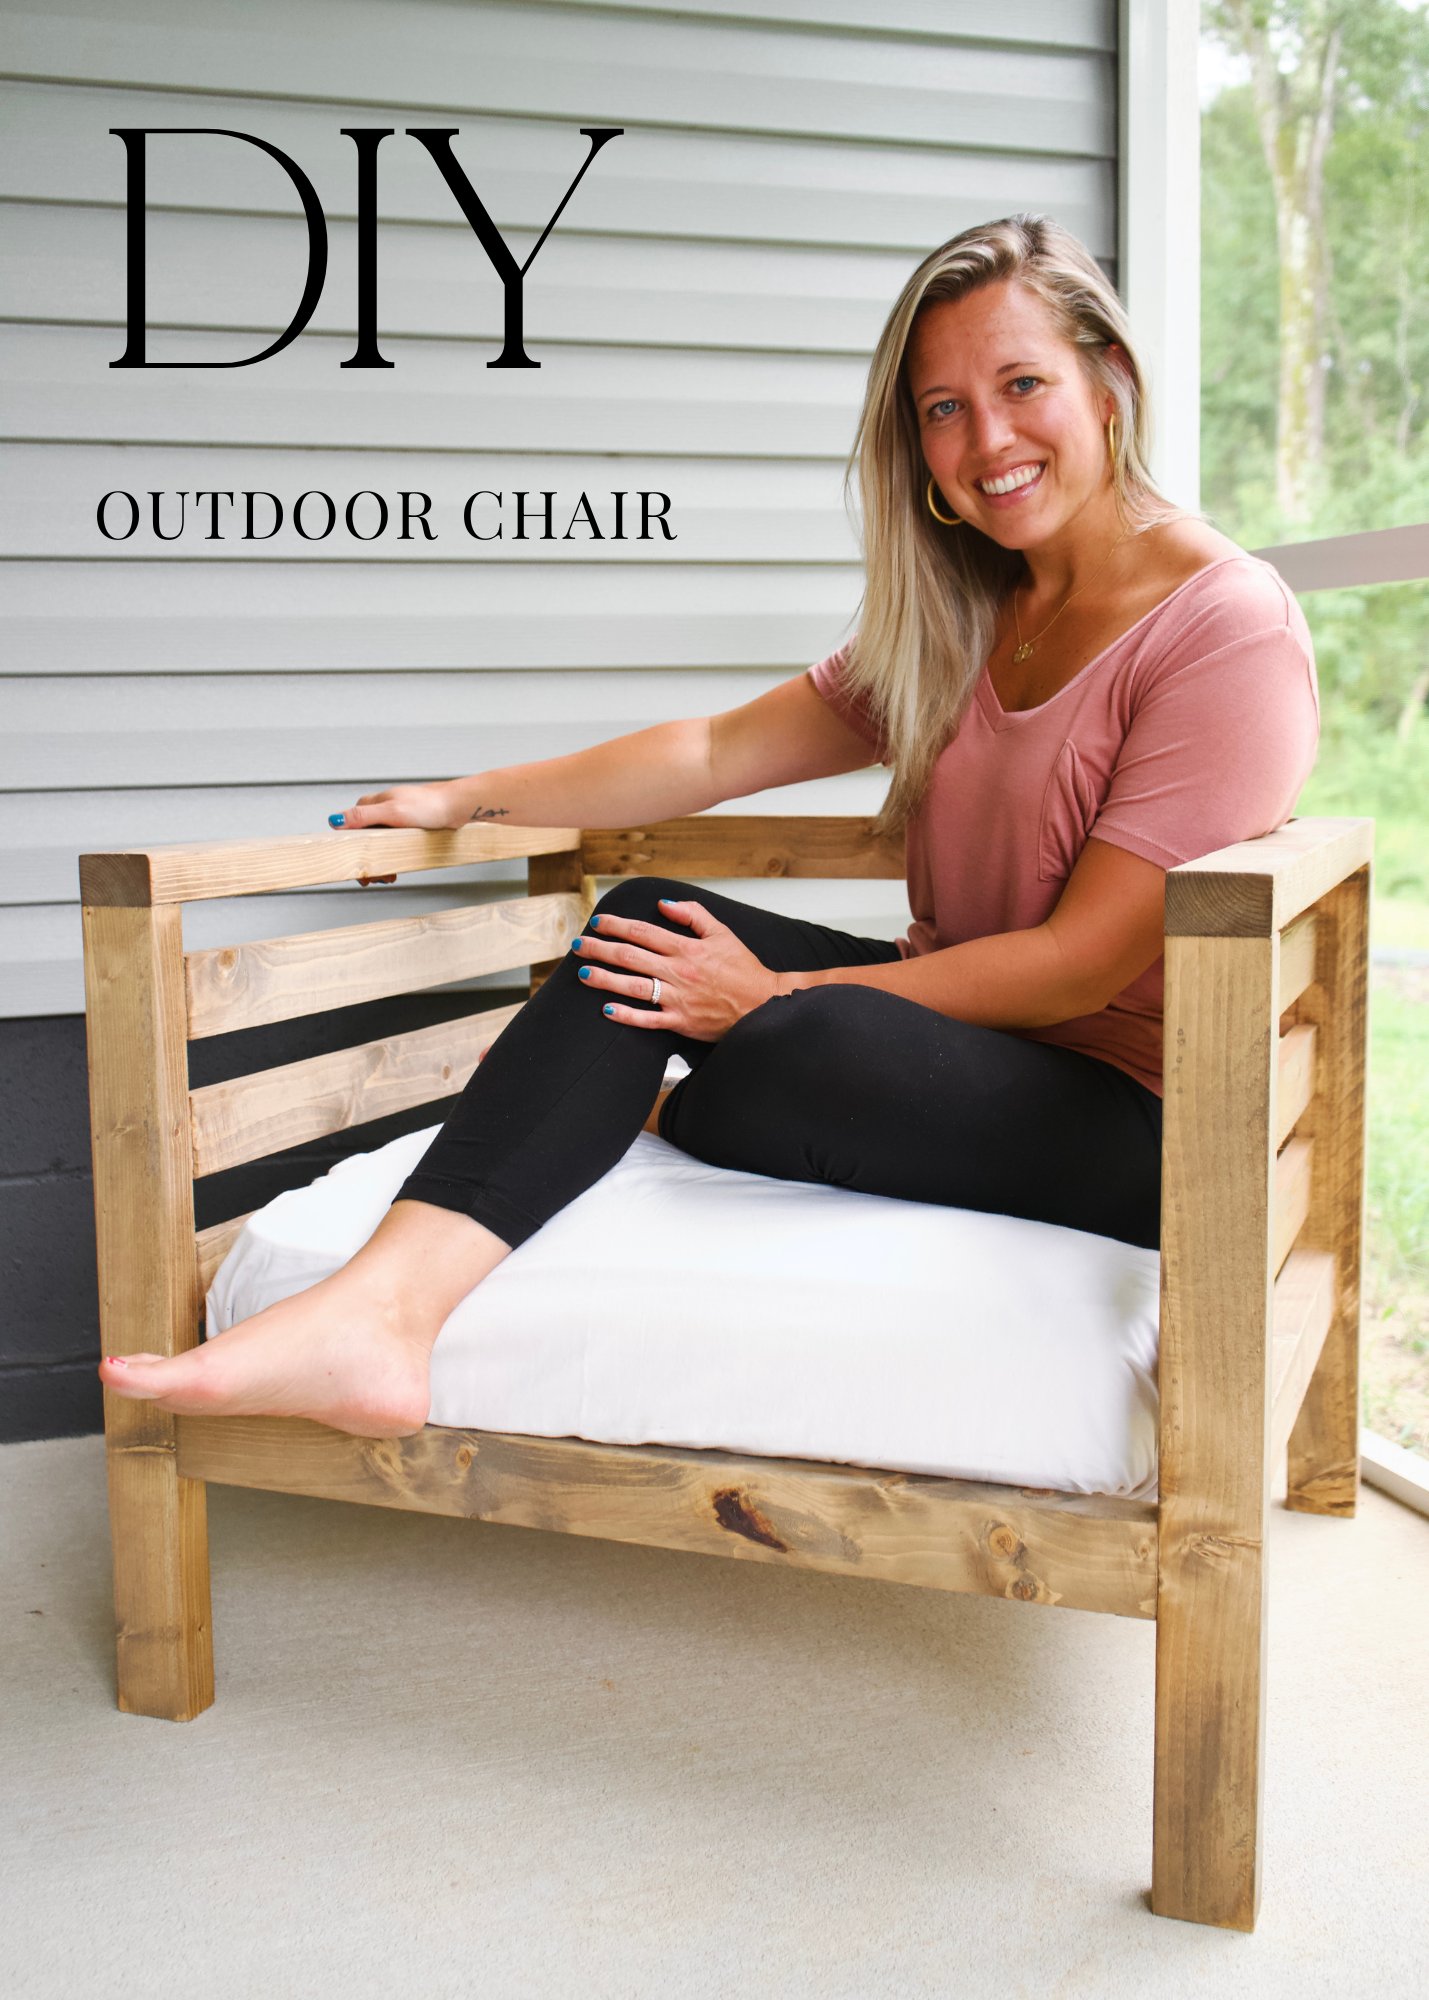
I used these plans (loosely) for both the couch and chair. I did all my measurements custom, so I didn’t follow it identically.
2 years ago- 2021
This was right after I completed the Faux Ivy DIY.
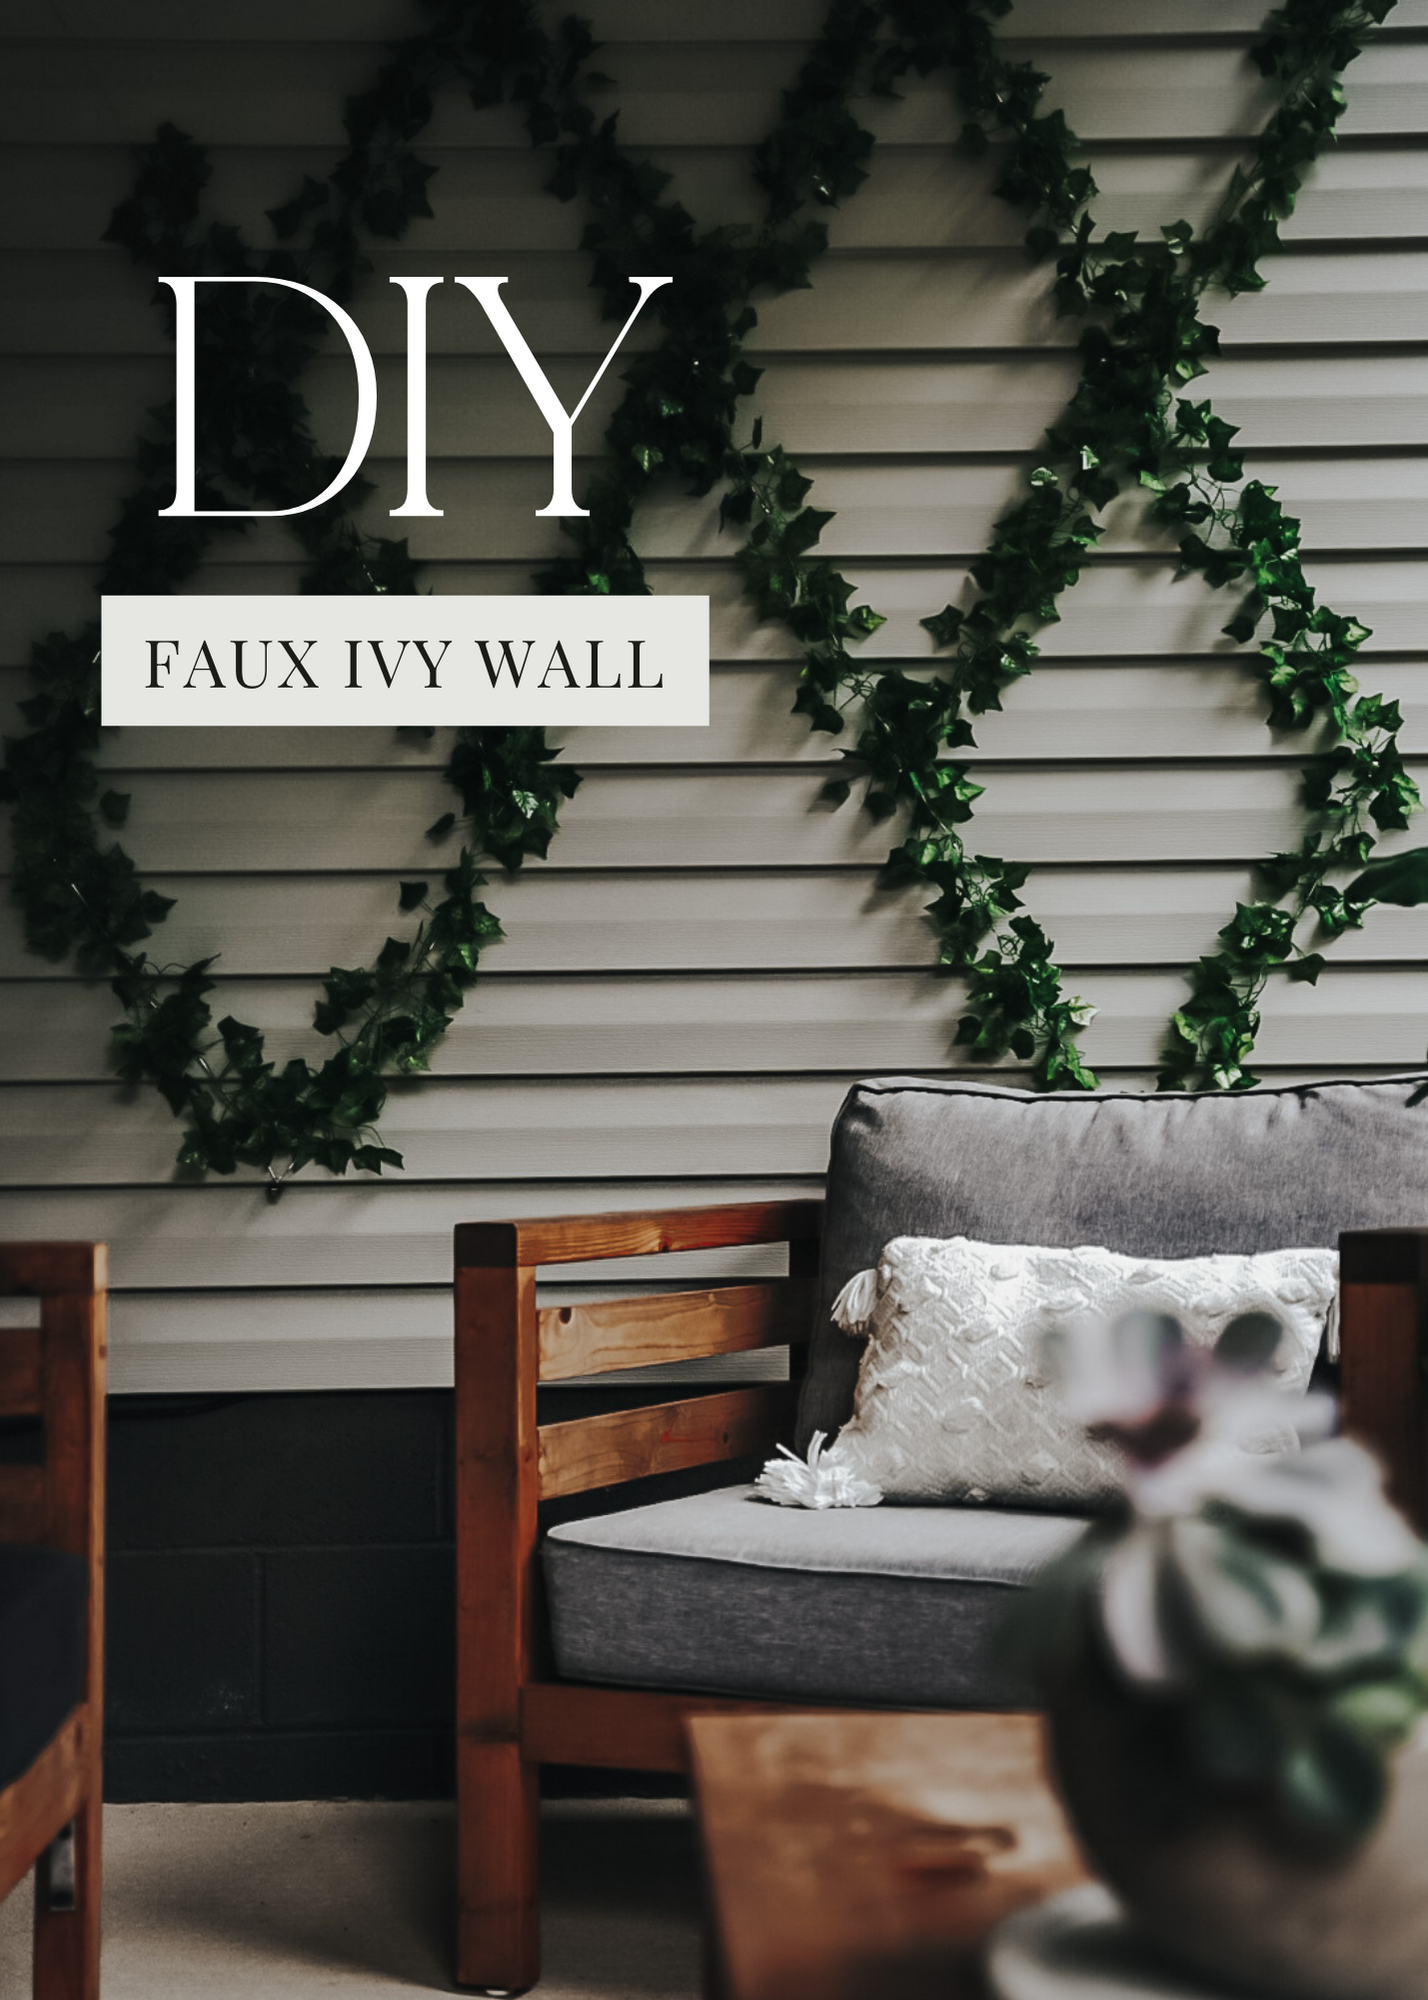
Link to faux ivy wall supplies
2 Days before project start
Concrete Prep
Cleaning & Degreasing
As with any home project, especially when it involves paint, prep is often the most important step. Skipping the prep work will most definitely affect the finished work, so don’t skip this part. Cleaning and degreasing is important because it removes any residues or oil on the surface that could affect paint adhesion. Even with the application of primer, flooring like outdoor concrete exposed to many different elements needs a good cleaning.
Pressure Washing
Pressure Washing isn’t a must, but it will definitely make the cleaning process much easier. If a pressure washer is something that you are unable to purchase or have access to, a hard bristle brush and water hose can do the job as well.
PRO TIP: If you were not aware, many home improvement stores have rental options for tools and equipment for an affordable fee. This offers great options for DIY projects!

Etching
Etching is essential in the process of painting concrete. It opens the pours of the concrete surface so that the paint or stain can adhere properly and effectively. The smoother the concrete, many times it is often less porous, but you can test to see if the concrete is porous by doing a water test. Fill a small tube with water and a drop or two of liquid soap. Distribute drops across the concrete surface evenly. If the water is absorbed in less than a minute, the concrete is considered porous. If it does not absorb, it would be considered non-porous.
To etch concrete you can either use a grinder specifically for concrete surfaces or a 3-in-1 wash like this. This particular wash is environmental friendly and can be used both indoors and out. The application is super easy and you simply rinse off!
When can concrete not be painted?
The only time concrete cannot be painted is if it was recently poured. You should wait at least 60 days after installation. It takes 30 days to cure and then 30 days for the moisture to balance.
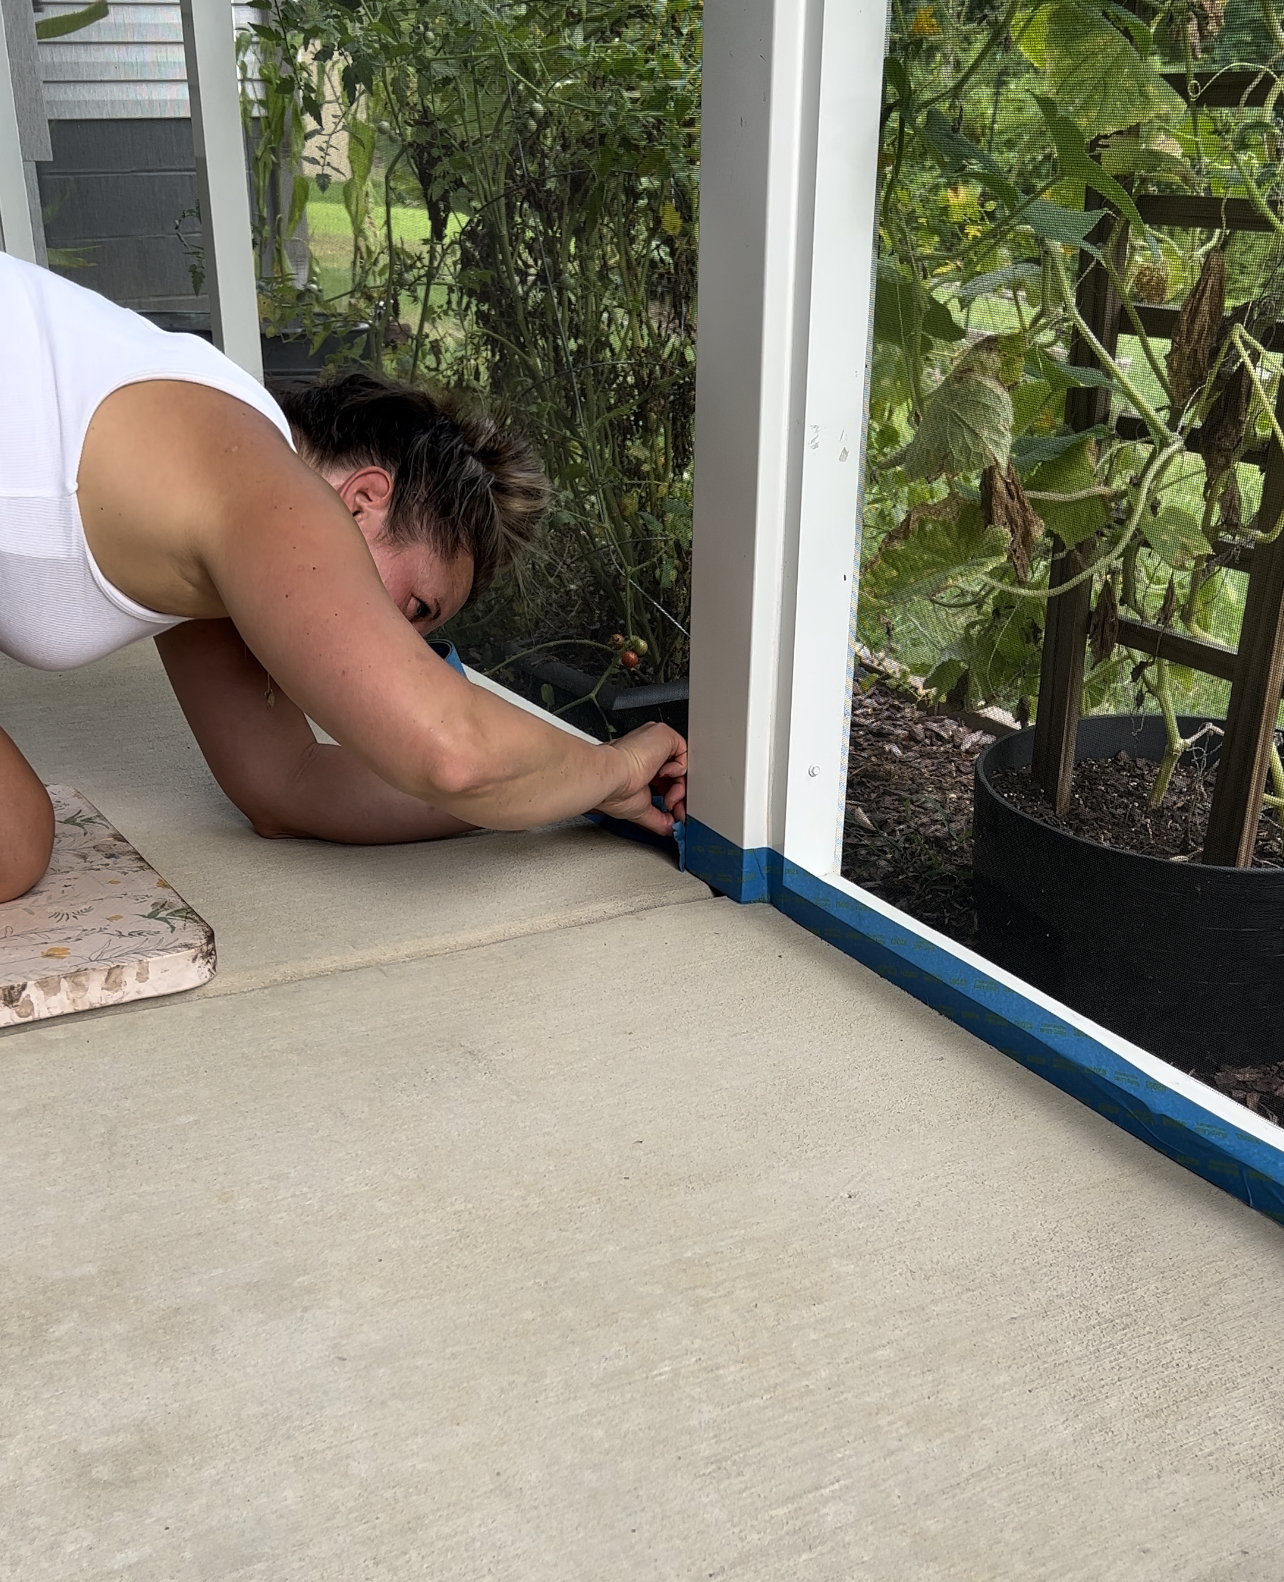
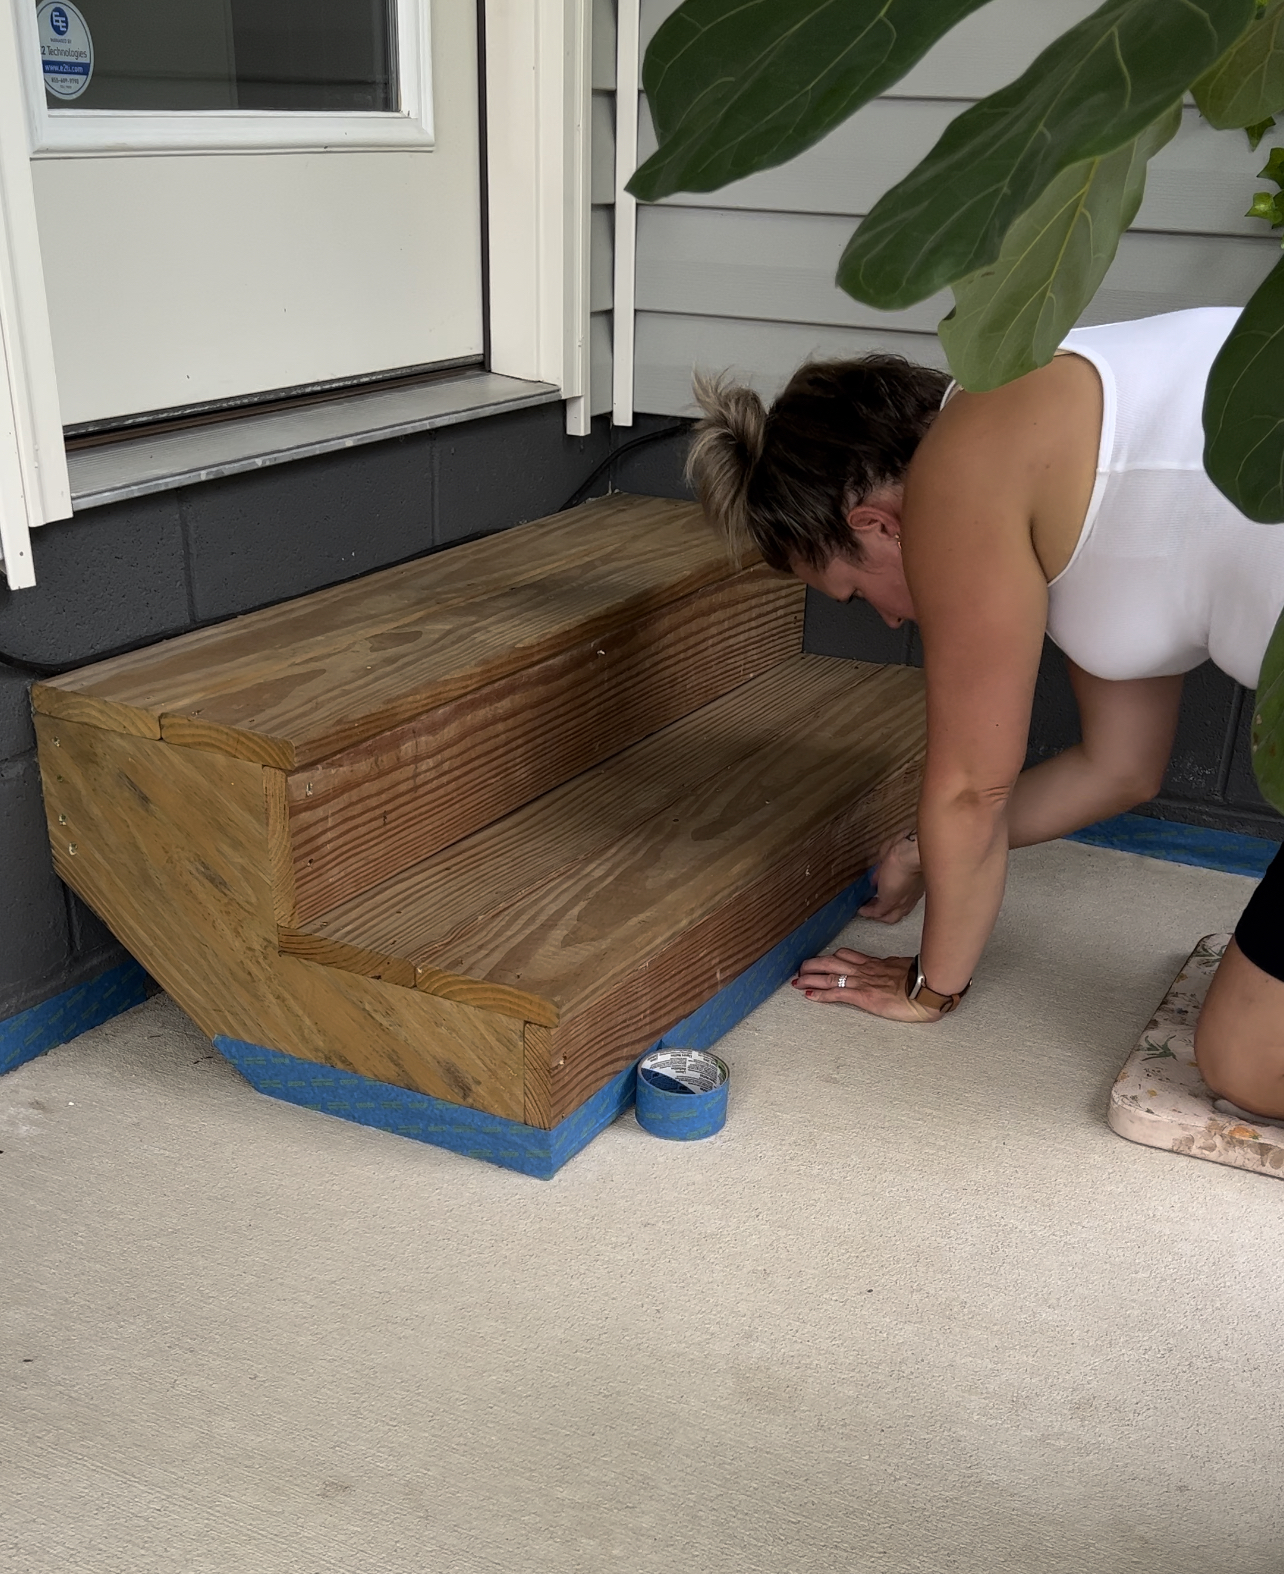
Taping
I decided to tape off the edges on the porch area but if I painted another concrete area I would opt out of taping. The reason why I would opt out is because I could not remove the tape when the paint was wet. I had to do this project over a three day process, so taping and re-taping was not an option. It is not recommended to take tape off after paint is fully dry because of the risk of peeling and I unfortunately did have one place where that happened. Easily fixable, but also easily preventable as well!
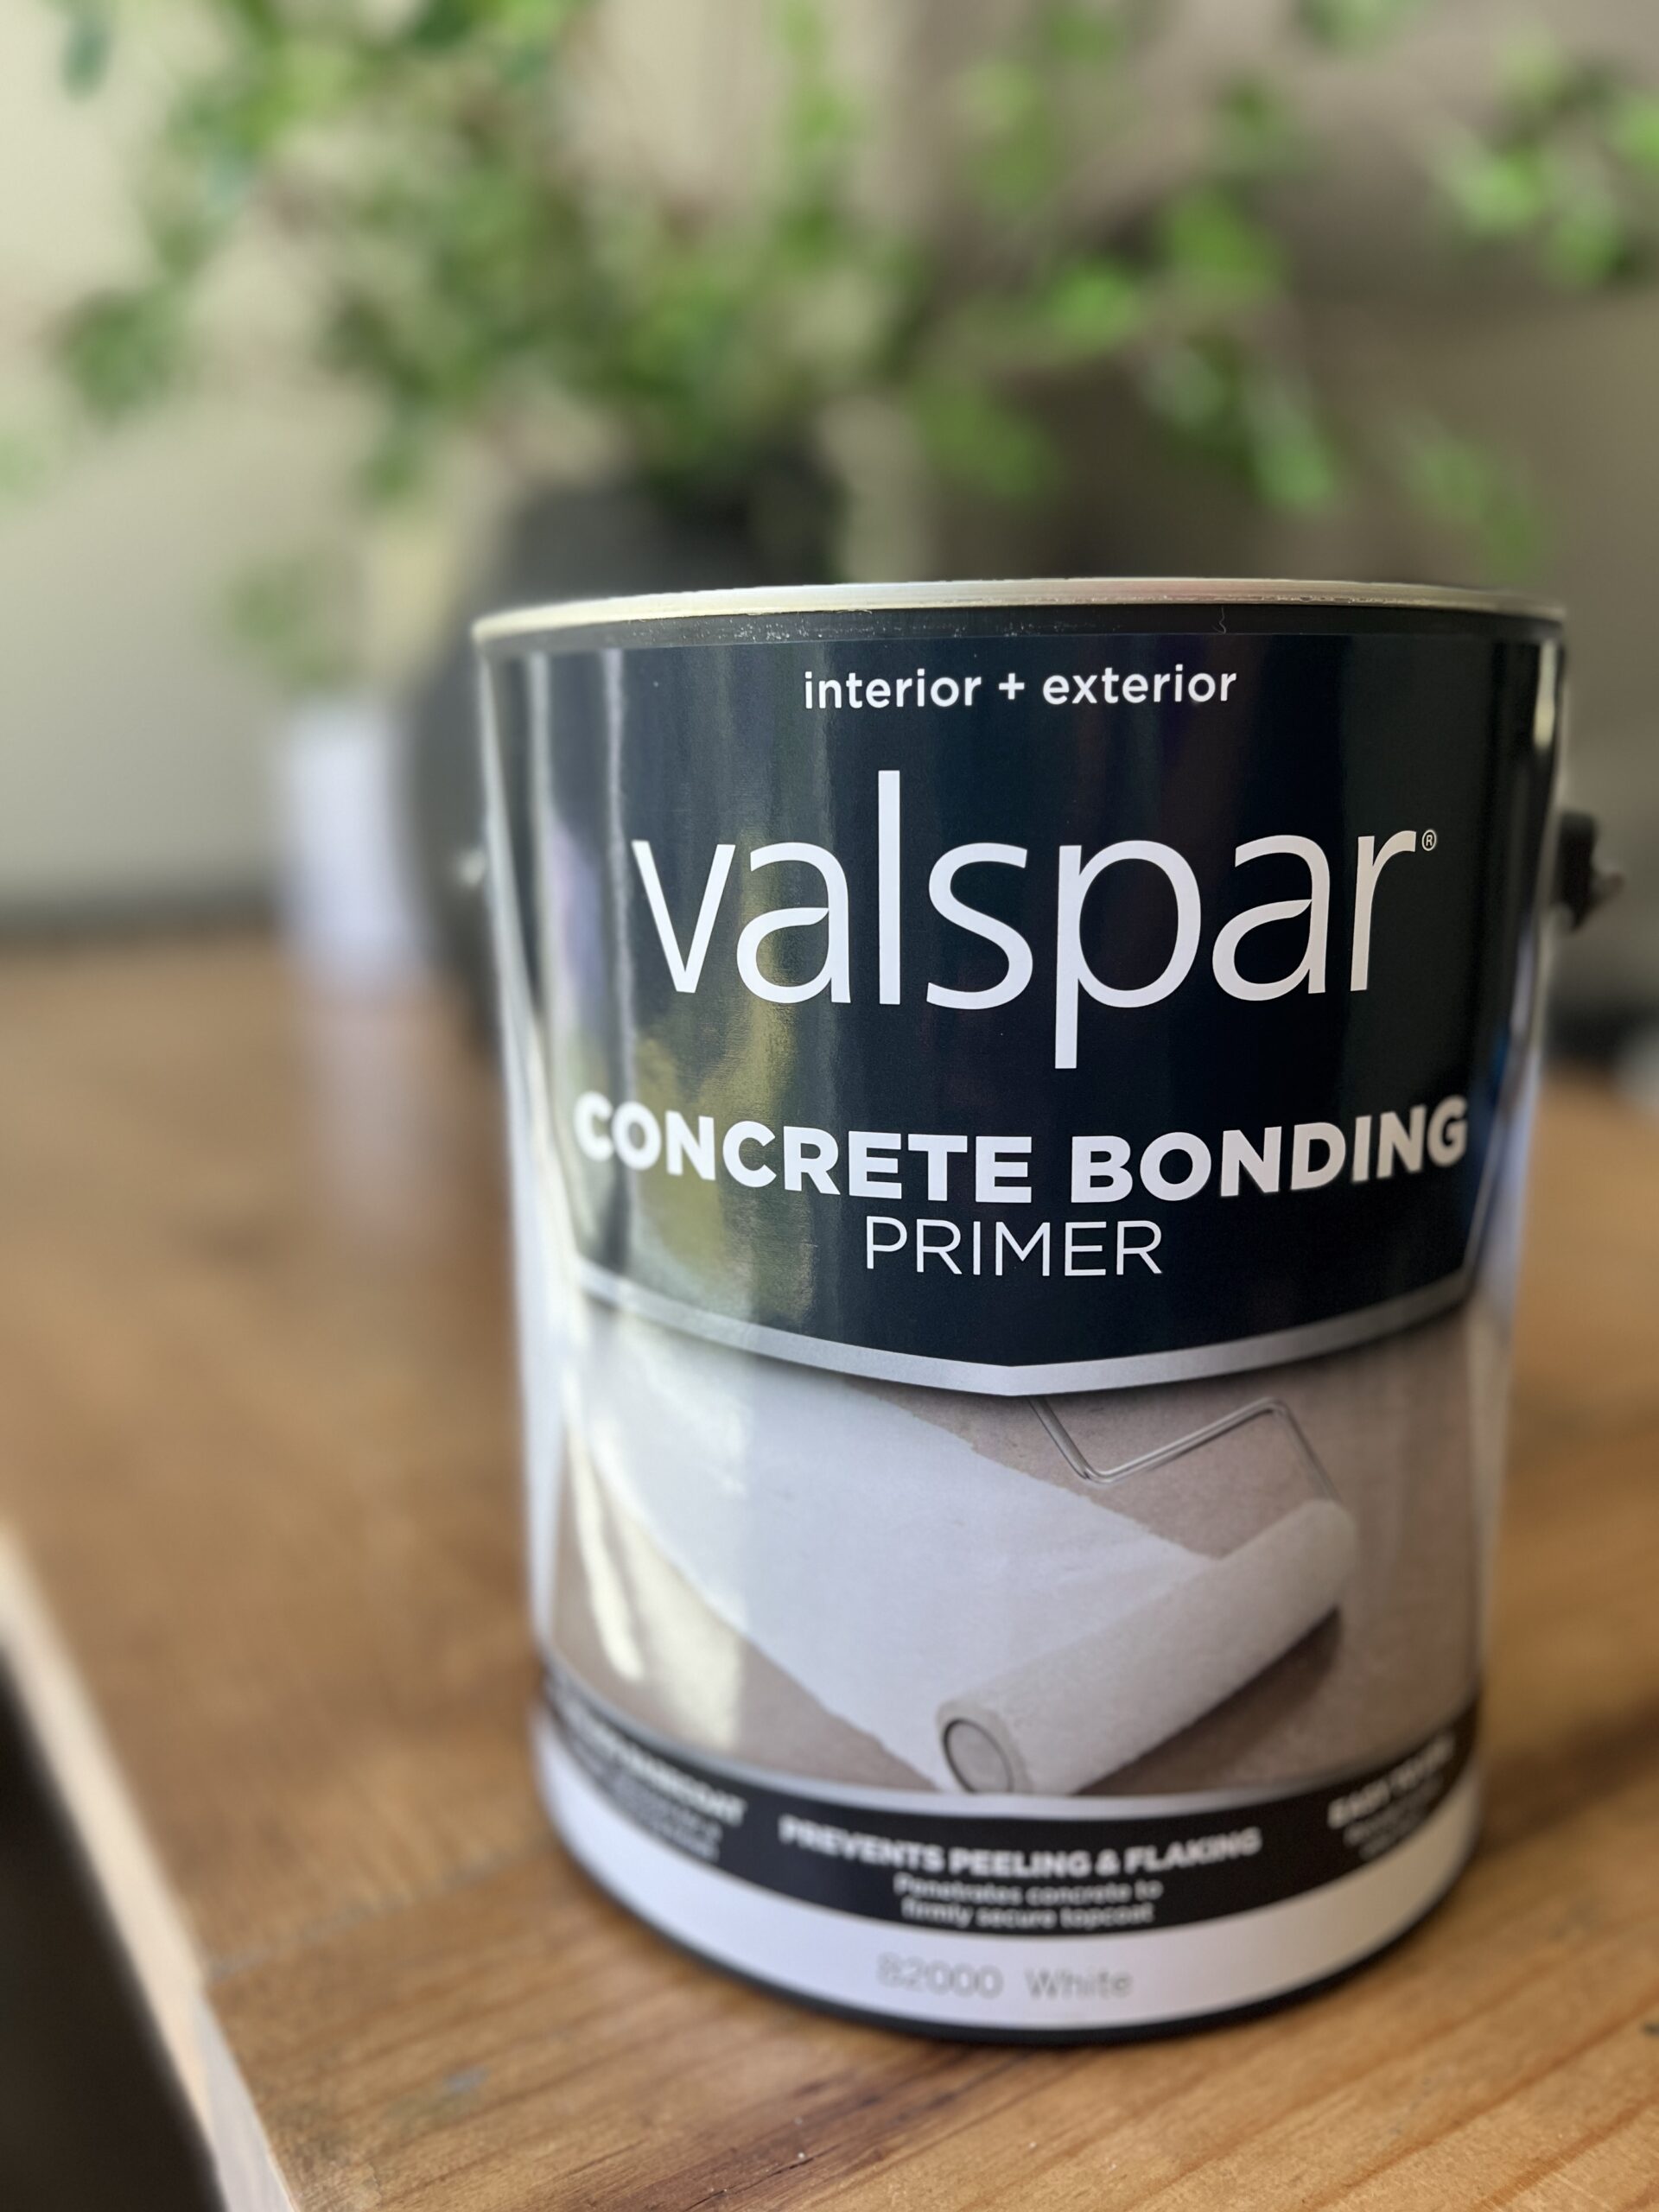
Priming
To prime, I used this Valspar Concrete Bonding Primer. It goes on white and dries clear and tacky. The most important thing with this specific primer is the first coat of paint has to be applied within 1-4 hours after application. So plan your time accordingly, because if the first coat of paint isn’t done in this timeframe it has to be recoated with primer. To apply I used my extender roller and this nap roller.
1st Coat of Color
For the first coat of color I used this creamy white called Vintage Taupe in the Valspar Porch, Floor and Patio paint. I am so impressed with the quality of this paint. The consistency is slightly thicker than that of your regular indoor latex paint but it goes on so smooth.
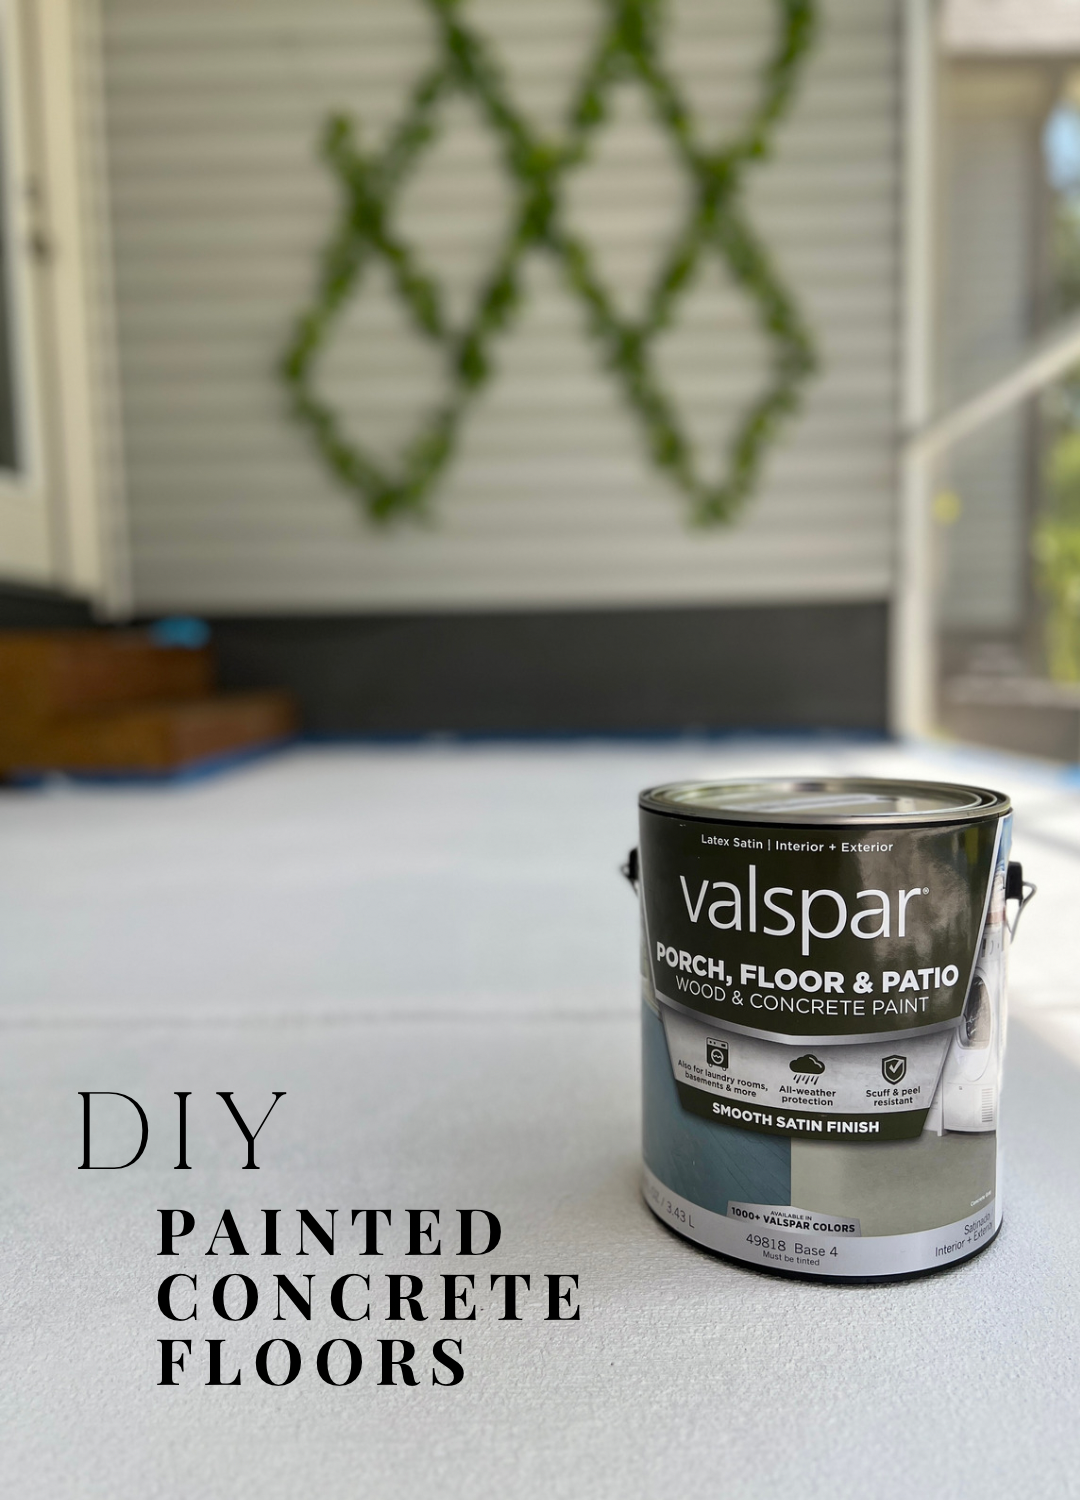
For my application: I applied the color over the entire patio floor. There are several different ways you could approach this step. I don’t think one way is better or less, I think it just depends on your personal preference. When doing a checkerboard pattern you can also tape off the pattern first and then just paint the squares separately with the 2 colors. After going through my options, my best choice was to do the entire floor the base color (Vintage Taupe) and then add the accent checkerboard color (the black).
Tracing Checkerboard Design
Tracing the checkerboard design was honestly the most intimidating part of this patio project. I almost talked myself out of it before I even started… But then I remembered my dream of having these floors and told myself “We do hard things around here!” 🙋♀️
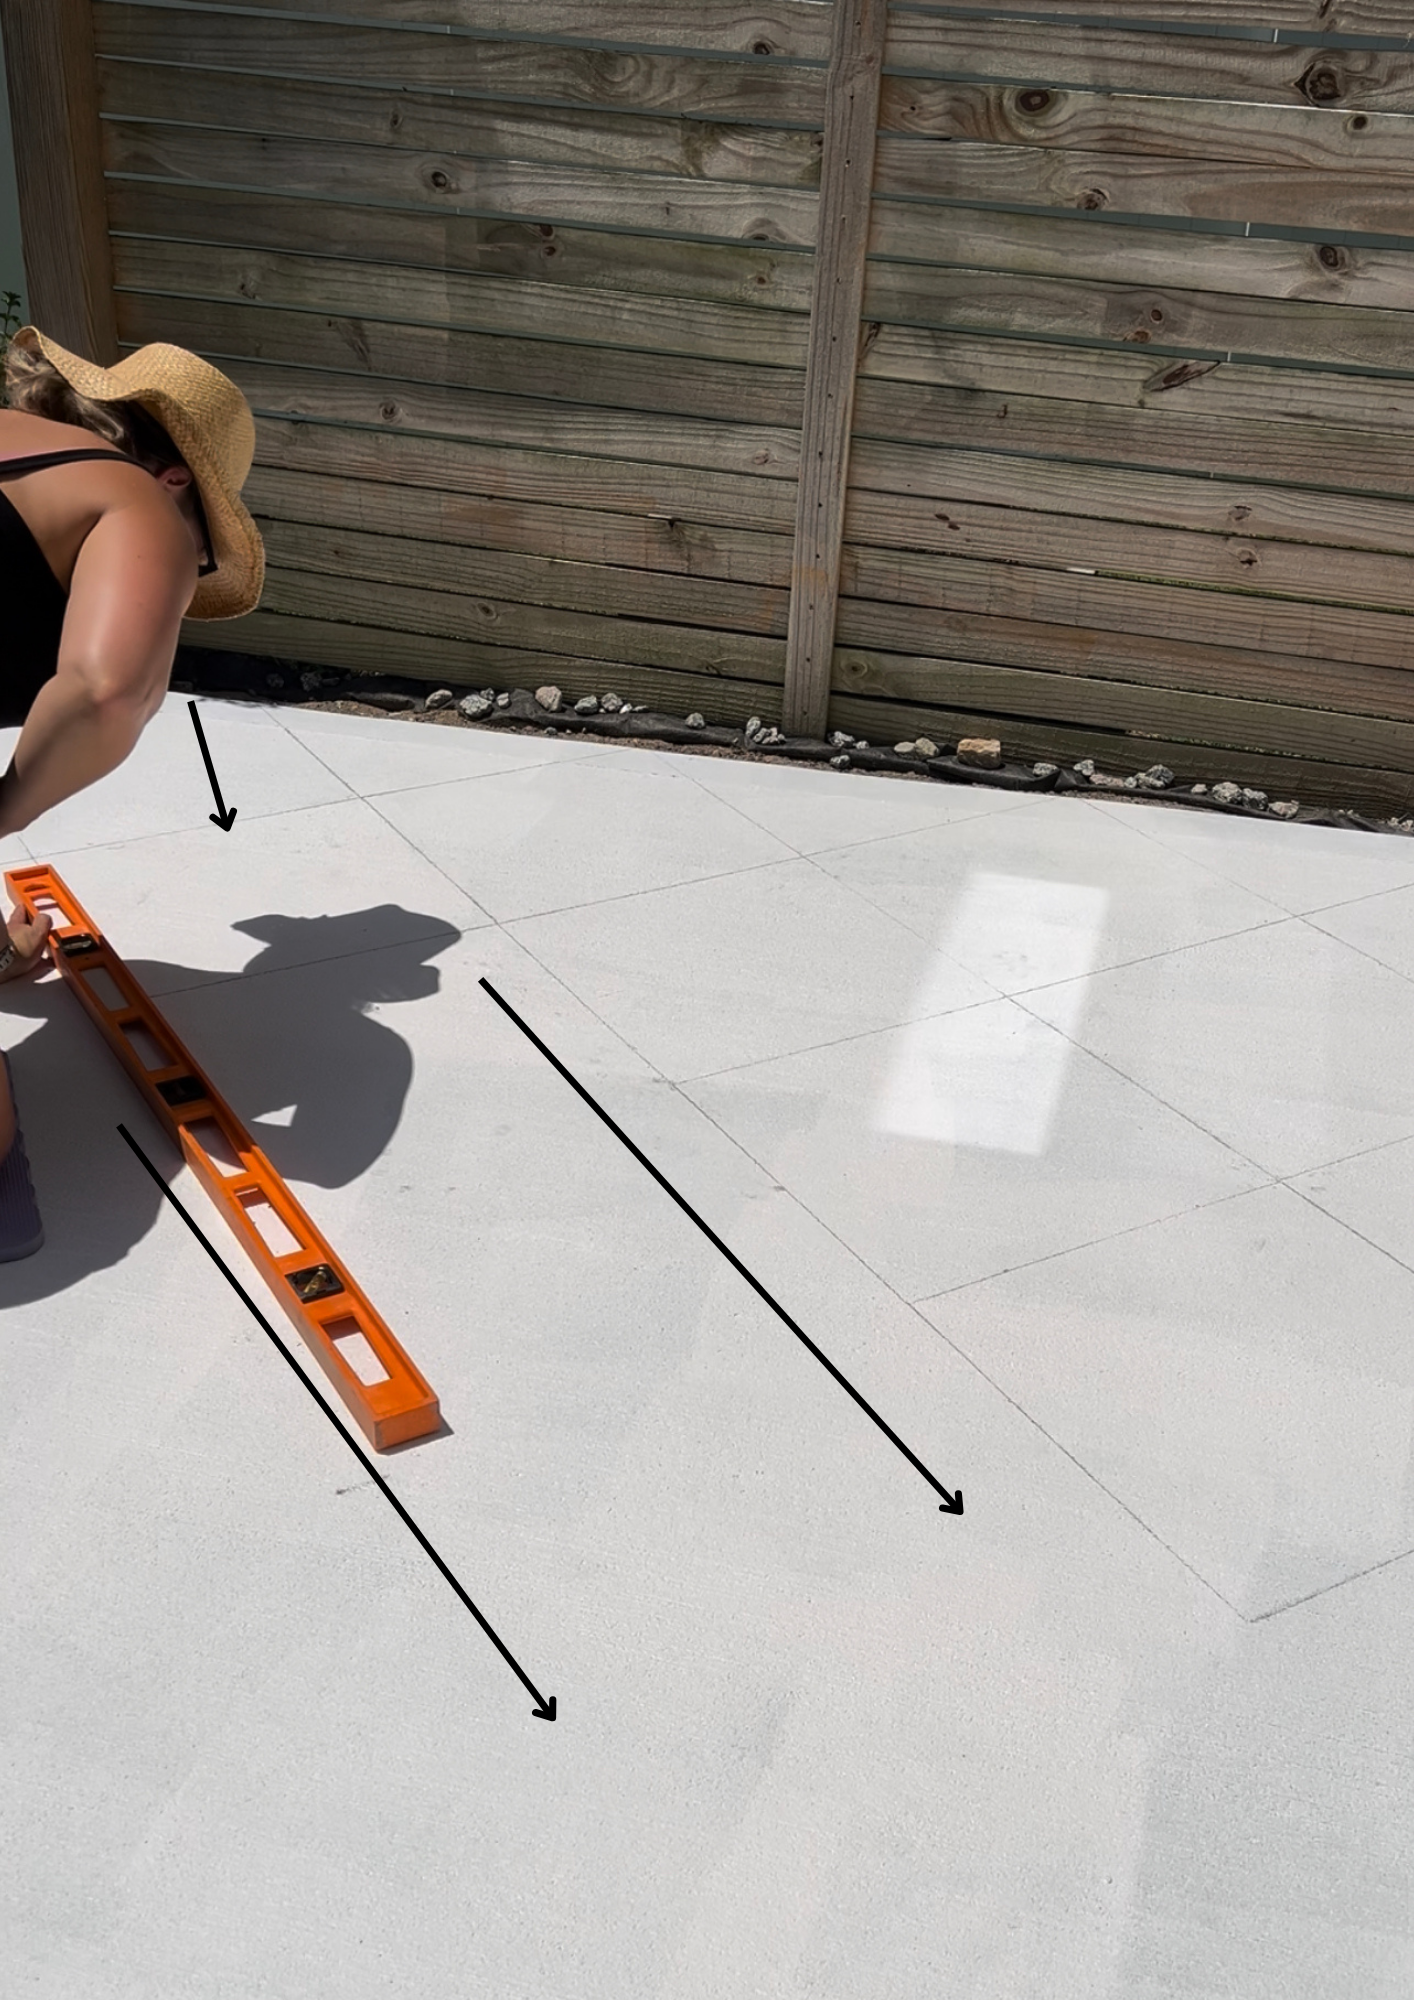
It actually worked out in my favor for the starting point of the checkerboard design, because it required no math. Me + Math = Disaster 😂. Using the 18 x 18 tile, a long level/straight edge and pencil, was THE KEY to success and such a time savor.
Applying Accent Color
When I first started the accent color (the darker color: Caviar), I used a foam brush for the sides and another larger brush for filling in. After doing this for about 6 squares I realized that this was going to take forever and not the most useful in getting a good coverage in color. “Work smarter, not harder”!
So I switched to using a 4 inch roller and it went much quicker, as well as a much better coverage. As you can see in the below video, I cut in with the foam brush and then rolled the center. For the entire porch and patio it took me a collective 8 hours to do this accent color. I honestly think this was a very good time. I can’t imagine how long it would have taken me to tape this entire area off and then paint, so in my case I truly think I saved good time. *Note: even if I had used the tape method for my squares, our concrete is roughly textured so I ran the risk of bleeding paint. I could have used the base color along the tape edge and then paint the Caviar, but that also would have been time consuming.
All in all, this method of painting by hand worked perfectly and smoothly for me and I would 100% do it this way again!
Top Coat
I contacted Valspar by phone to clarify if a top coat was needed. I thought I would need a top coat, especially after seeing some other tutorials, but YOU DON’T with this paint. The customer relations at Valspar stated that a top coat would actually alter the durable properties this outdoor paint was made for.
The Disaster
Just looking at this picture below brings back a moment of sheer anxiety. I legitimately freaked out seeing that bubble in the paint. And what would any non-normal person do when they see a bubble… pull it. And what happened next after I pulled a tiny half nickel bubble resulted in this below.
After regrouping and realizing that all problems have a solution, I got to work. This little area is right under the door frame, as you can see in the upper left corner. I think what happened is when I painted the first coat I closed the door overnight and the rubber door flap on the bottom sat across this area. Which altered the integrity of the paint and caused a section not to dry appropriately.
To fix this, I peeled by hand all that would come up manually. Then I cleaned it really good with a cloth. After that, I took our handheld grinder and etched the concrete over the entire area. The grinder was super easy to use and created a smooth non-peeling surface to reprime and then repaint.

So after two long nights listening to the crickets and allowing my mind to find much needed solitude in the quietness of nature and DIY, THIS is the final result!

I just want to say a deep hearted thank you for being here. I say it all the time, but I truly mean it. You have no idea how much your kind comments, encouragement and support means to our family. In all the uncertainty of the world and everything happening around us at any given day, these projects are my therapy. They become my safe space to think, pray, dream and PRAY some more. What a beautiful gift it is to be able to create these spaces with my hands. I hope this inspires YOU to go out and create the same for your home. To step out of your comfort zone and do that thing that feels scary. It just may be the catalyst to a dream come alive buried deep in your heart.


